Adjust the Levels and Elevation of Openings
Introduction
Openings in Revit are constrained to levels (Base Level and Top Level). These constraints determine in which floor plan views the opening appears and how elevation values are calculated for tags and dimensions.
If the level constraint is incorrect, openings may show up on the wrong floor plan or display incorrect elevation values in your tags. The Level/Elevation feature lets you reassign levels and set precise elevations without the errors that can occur when editing Revit parameters directly.
Changing the Base Level directly in Revit's Properties Window causes a "cannot create type" error. Revit tries to maintain the existing offset while moving the opening to a new level, which results in an invalid placement.
Always use the ConVoid Level/Elevation feature instead. It handles the offset recalculation automatically and prevents this error.
Video Tutorial
Overview
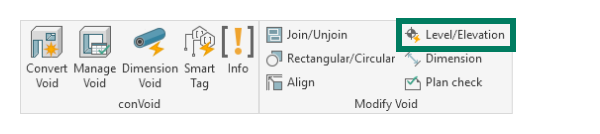
You find the Level/Elevation feature in the [conclass] ribbon tab.
The feature has two functions:
| Function | Description |
|---|---|
| Adjust Levels | Change the Base Level and Top Level constraint of openings. ConVoid recalculates offsets automatically. |
| Adjust Elevation | Set the Top, Middle, or Bottom elevation of openings relative to a reference level. |
Adjust Openings Levels
Use this when you need to reassign openings to different levels, for example to correct which floor plan they appear in.
- Go to the [conclass] ribbon tab and start the Level/Elevation feature.
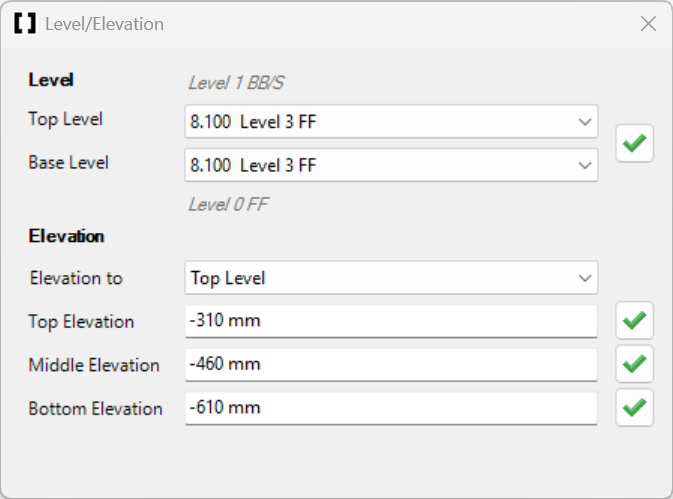
- In the dropdown menu, select the Top Level and Base Level you want to constrain the openings to.
- Select one or multiple openings.
- Click the [Apply] button next to the dropdown menu.
ConVoid automatically adjusts the constraint and recalculates the distance of the selected openings to the chosen levels.
Adjust Openings Elevation
Use this when you need to set the exact vertical position of an opening relative to a level.
- Go to the Level/Elevation feature.
- Select one or multiple openings.
- In the Elevation dropdown menu, select the Base Level or Top Level that you want to use as the reference for the elevation.
- Enter the desired value for the Top, Middle, or Bottom elevation.
- Click the [Apply] button next to the elevation value or press Enter.
ConVoid automatically adjusts the elevation of the selected openings based on the reference level and the value you entered.
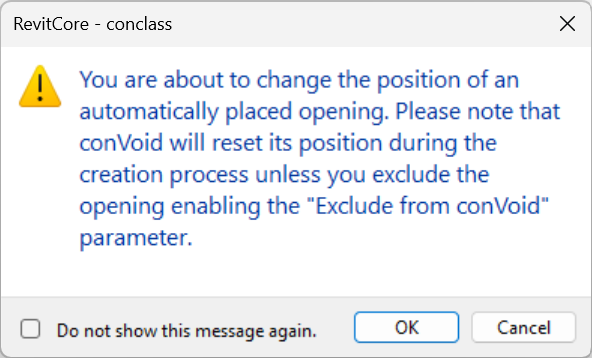
Important: Protecting Manual Changes
If you change the elevation of an opening that was placed automatically by ConVoid, you will receive a warning that the position will be reset during the next creation or update process.
To prevent ConVoid from overwriting your manual changes, enable the "Exclude from conVoid" parameter on the opening. This protects the opening from any automatic changes.
Learn more: Exclude Elements