Clash Detection
Introduction
Clash Detection lets you check two groups of elements against each other and visualize every collision directly in your Revit model. Use it when you want to coordinate disciplines, for example:
- Electrical vs. Plumbing
- Ventilation vs. Plumbing
- Plumbing vs. Plumbing
- Walls vs. Ventilation
- Columns vs. Ventilation
Video Tutorial
Clash Detection uses the same filter logic as in Workflow A, Workflow B and Workflow C, but instead of generating openings it places clash markers that you and other disciplines can review and comment on.
Step 1: Create a Clash Filter
- Open ConVoid from the Revit ribbon tab [conclass] > Convert Void.
- Create a New Filter, give it a name and select Clash Mode in the drop-down.
Creating separate filters per Clash Group (e.g. Ventilation vs. Plumbing) lets you organize the results with the FilterId parameter, so you can filter and manage them independently in schedules and views.
| Icon | Action | Description |
|---|---|---|
| Create new filter | Creates a blank Opening Filter with default settings. | |
| Duplicate filter | Copies all settings of the selected filter. Useful when creating a second filter for another discipline. | |
| Rename filter | Give the filter a meaningful name, e.g. "Ventilation" or "Plumbing". | |
| Delete filter | Removes the selected filter permanently. | |
| Export filters | Saves all Opening Filters to an *.xml file for reuse in other projects. | |
| Import filters | Loads Opening Filters from an *.xml file into your project. |
Step 2: Import ConVoid Families
If the ConVoid families are not yet loaded, a prompt will appear asking you to import them.
Click [Yes] and the ConVoid library folder will open. Import the families listed in the dialog. If you cannot find the library, download it here.

If you followed the Import ConVoid Families chapter earlier, the families are already in your project and this dialog will not appear.
Step 3: Set the Creation Scope
Define the upper and lower levels (and optional offset) between which ConVoid will run the clash detection. If you activated the Section Box in a 3D view, this option is grayed out because the scope is already defined by the section box. For more details, see Define the Creation Scope.
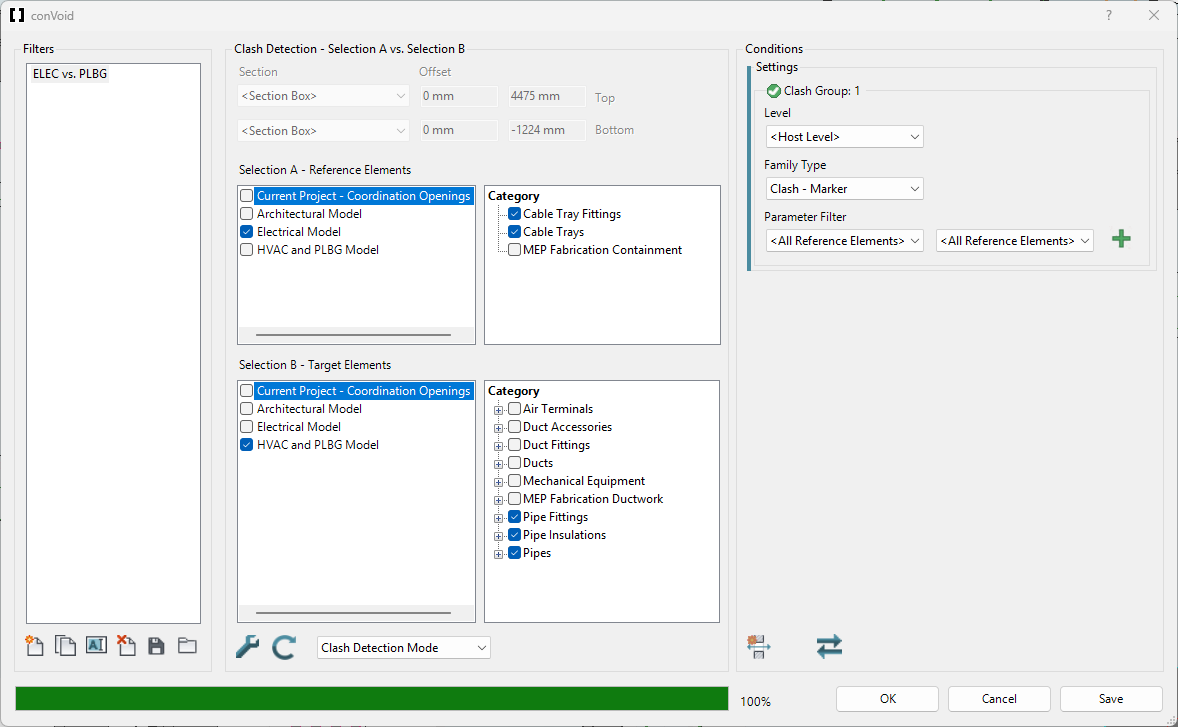
Step 4: Define Selection A and Selection B
A clash detection always compares two groups: Selection A against Selection B. You define each group with a parameter filter, exactly like in Opening Mode.
In the example below, Electrical is checked against Plumbing:
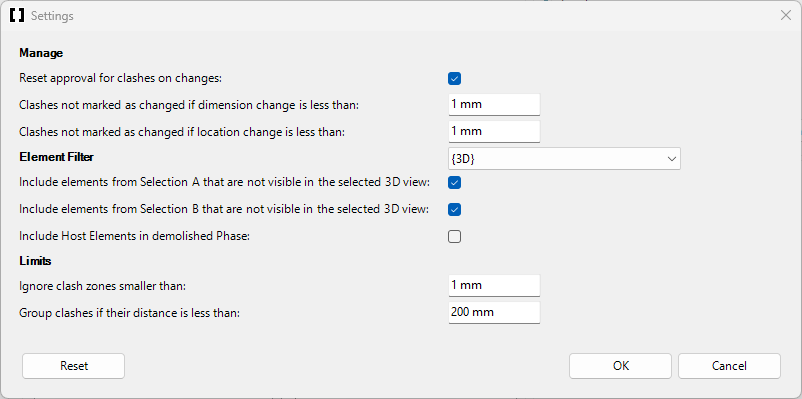
Step 5: Configure the Settings
Click Toolbox to refine how the clash detection runs.
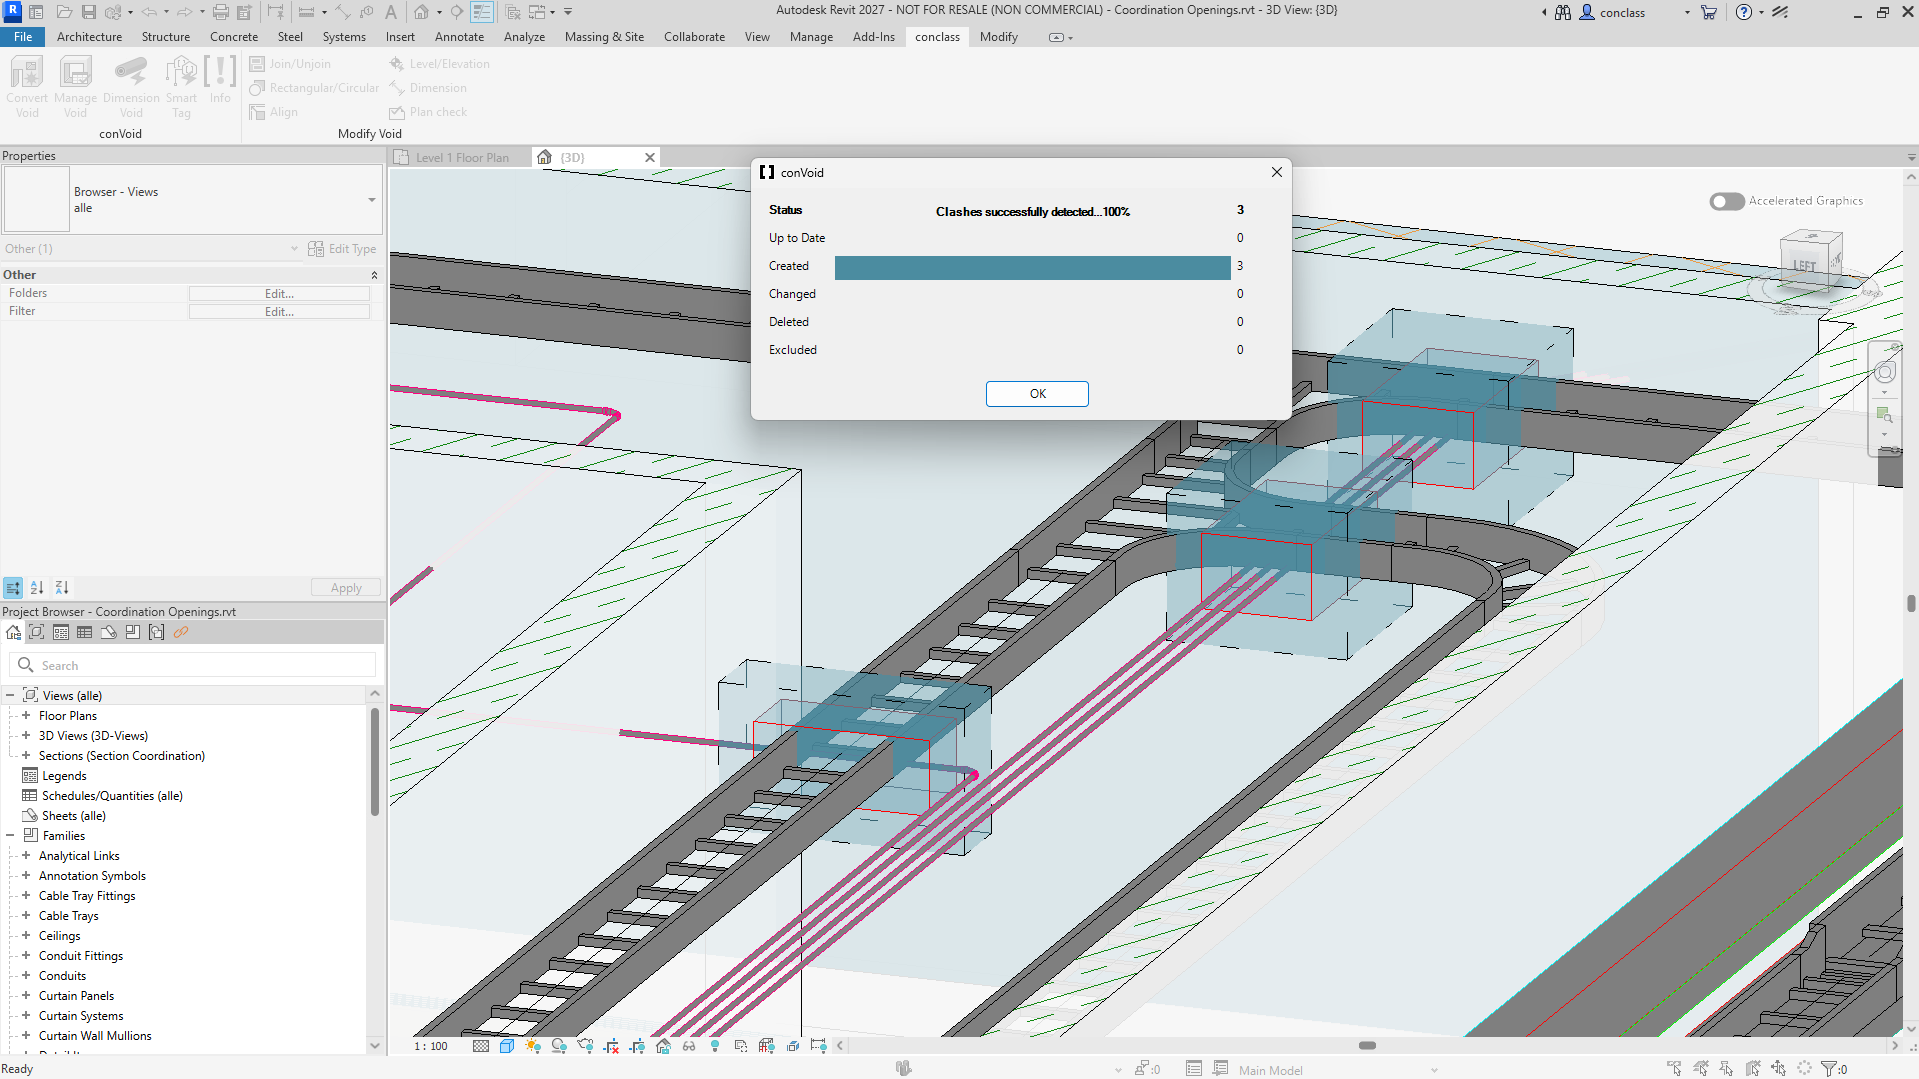
Step 6: Run the Clash Detection
Click Refresh and wait until the status bar turns green. If clashes were found, the Conditions section will be enabled. If it stays gray (disabled), ConVoid could not detect clashes in the predefined scope.
Select Host Level. The clash marker will follow the base and top levels of the host element, which provides the best results.
Select <All Reference Elements> to include all detected clashes. This is the recommended setting for most projects.
With ConVoid's Parameter Transfer, you can enrich your clash markers with values from three sources in a single step:
- Selection A (e.g. Cable Trays) to clash markers
- Selection B (e.g. Pipes) to clash markers
- Levels to openings
Click OK to start the clash detection.
Step 7: Review the Clash Markers
ConVoid creates clash zones automatically and places 3D clash markers in the model. They are organized for review in both 2D and 3D views. You can also run the Approval Workflow with these clash markers.
ConVoid treats existing ConVoid Openings as already-handled clashes. If an opening at a given location matches the geometry of the reference element (within tolerance), no clash will be reported there, even if the opening has not yet been cut out.
Example: An opening already exists for a duct penetrating a wall. The clash detection will not list this duct/wall pair as a clash.