Parameter Transfer
Introduction
Openings need more than just a shape and size. Depending on your project, they require information like fire ratings for fire safety, material data for quantity take-off, or MEP system abbreviations for construction coordination. Without this data, your openings are geometrically correct but informationally incomplete.
With ConVoid's Parameter Transfer, you can enrich your openings with values from three sources in a single step:
- Reference Elements (MEP services, Provision for Voids, or Doors/Windows) to openings
- Host Elements (walls, floors, ceilings) to openings
- Levels to openings
This chapter builds on the opening creation workflows you learned in Workflow A: Create Openings, Workflow B: Adopt Openings, or Workflow C: Create Structural Openings. You should have created openings with at least one filter before continuing here.
Video Tutorial
- Workflow A: Create Openings
- Workflow B: Adopt Openings
- Workflow C: Create Structural Openings
Step 1: Open Parameter Transfer Settings
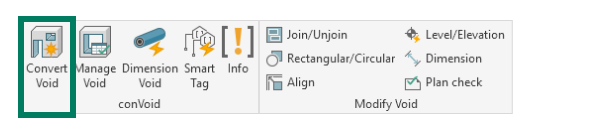
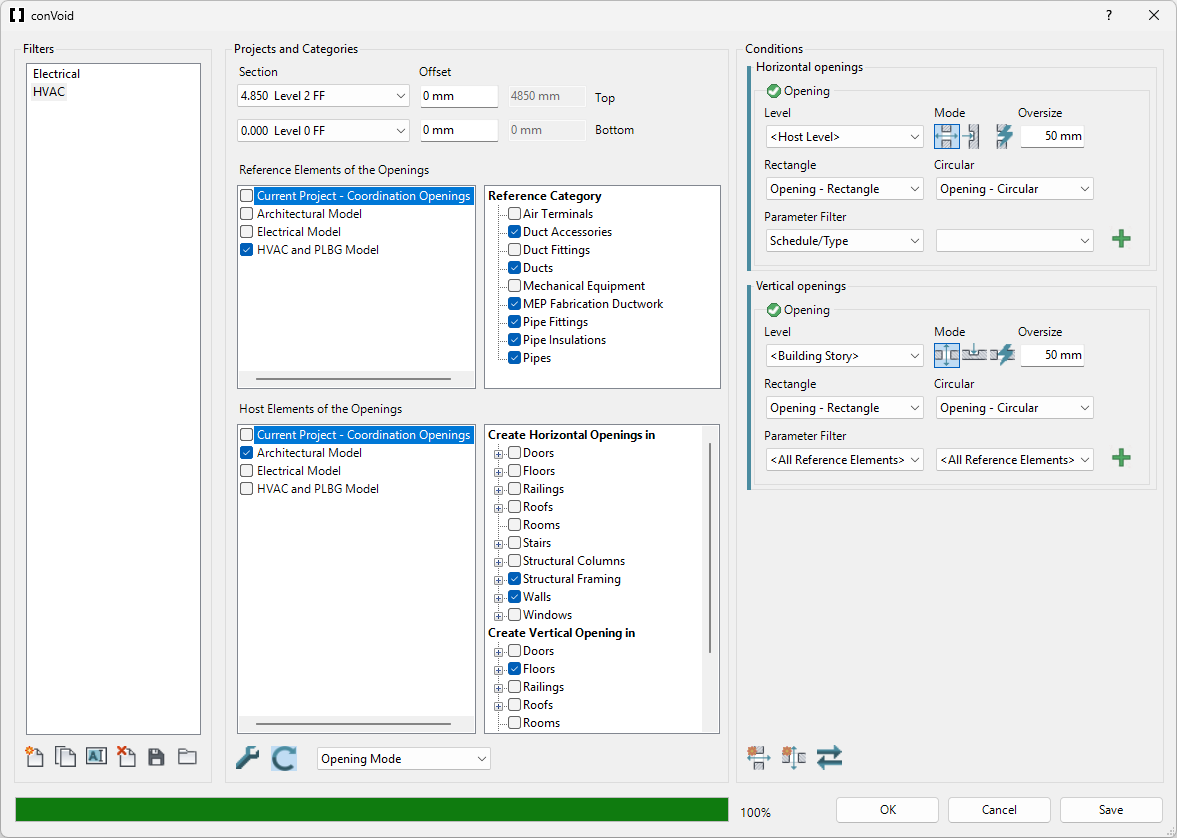
| 1. | Launch ConVoid and select an opening filter. If you have not created a filter yet, refer to Workflow A, Workflow B, or Workflow C. | |
| 2. | Run the clash detection. | |
| 3. | Then click [Parameter Transfer]. |
The Parameter Transfer dialog opens with three sections, each mapping values from a different source to your openings.
Step 2: Configure the Transfer Sections
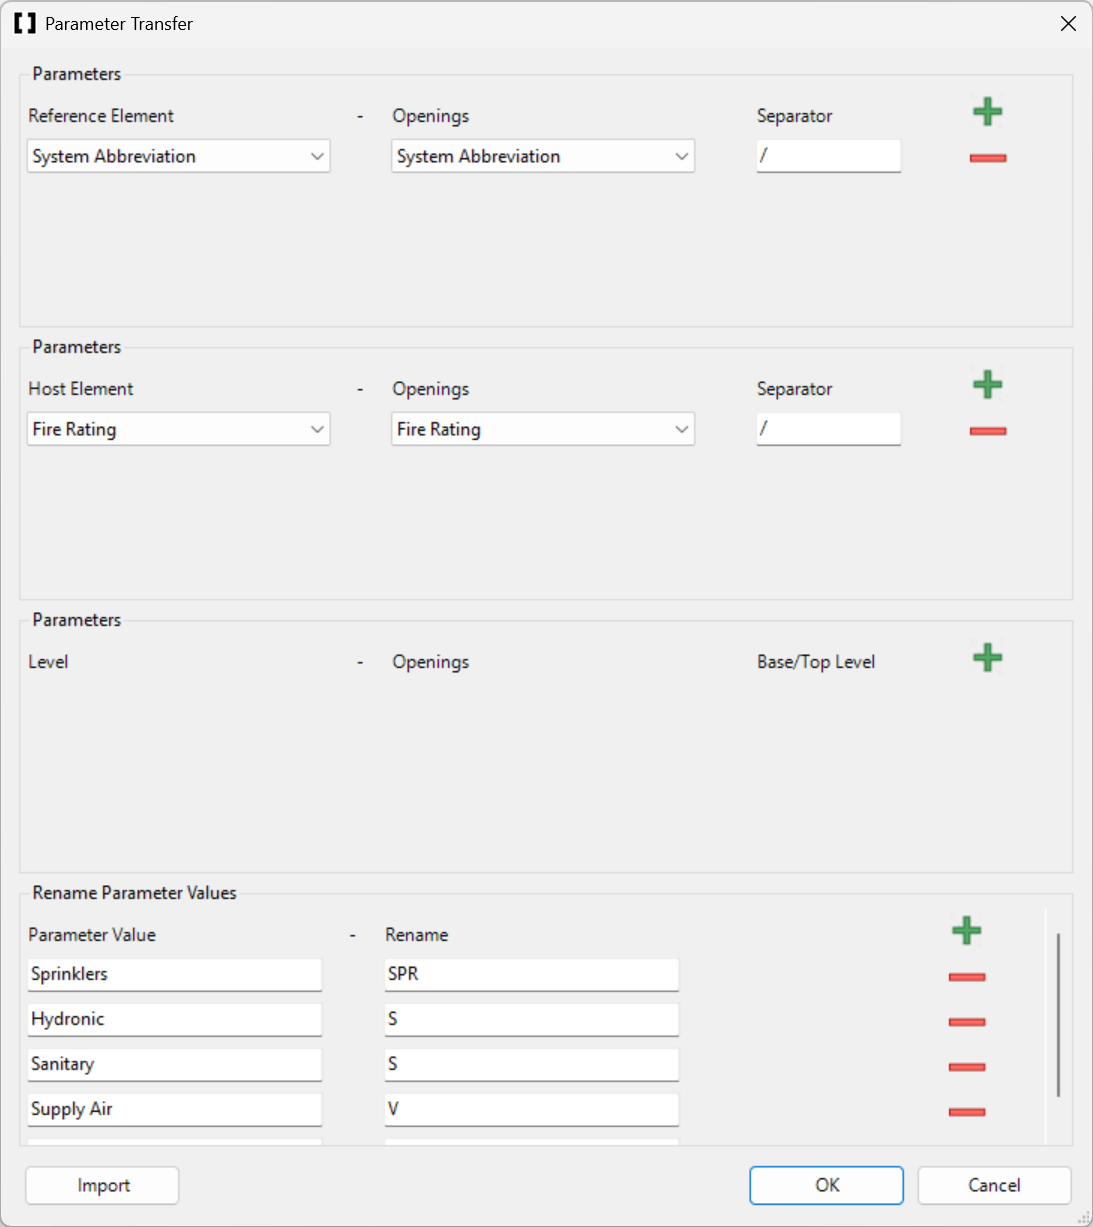
Each section works the same way: select a source parameter (left drop-down) and a target parameter (right drop-down) on the opening. Click the button to add a new mapping row.
ConVoid can only write to Text parameters on the openings. Boolean (Yes/No), Integer, Number, and other parameter types cannot be selected as targets. If you transfer a Boolean value like "LoadBearing", it will be written as the text string "Yes" or "No". This is by design because an opening can penetrate multiple hosts, resulting in combined values like "Yes/No".
ConVoid provides a built-in parameter called Model Name that transfers the name of the linked model to the opening. This is especially useful in multi-model projects where you need to identify which model an opening belongs to. You find it in the source drop-down list.
Section 1: Reference Element to Openings
This section transfers values from the elements that cause the opening:
- Workflow A (Create Openings): Transfer values from MEP services, e.g. System Abbreviation.
- Workflow B (Adopt Openings): Transfer values from the linked Provision for Voids, e.g. System Abbreviation.
- Workflow C (Create Structural Openings): Transfer values from Doors and Windows, e.g. the Door ID.
Section 2: Host to Openings
This section transfers values from the host elements (walls, floors, ceilings) that the opening penetrates. A typical use case is transferring the fire rating from a wall to the opening.
Section 3: Level to Openings
This section transfers level properties to the openings, such as the level name. This is useful for organizing openings by floor in schedules and exports.
How the Separator Works
When an opening is affected by multiple elements from the same source, ConVoid combines their values into a single text string using the separator character you define.
For example, if a pipe and a duct both pass through the same wall opening and you transfer "System Abbreviation", the result might be H/V (Heating/Ventilation), where / is the separator.
If multiple reference elements have the same value (e.g., two pipes both with diameter "100"), ConVoid shows the value only once: 100 instead of 100/100. To force distinct entries for each element, use the separator &&/ instead of /. This ensures each value appears separately regardless of duplicates.
Step 3: Rename Parameter Values
Not all parameter values use the naming conventions your project requires. For example, the system name "Sanitary" might need to appear as the abbreviation "S" on the opening. ConVoid lets you define renaming rules to transform values automatically during transfer.
You can add renaming conditions manually in the dialog, or import them from a CSV file for larger sets.
The CSV file must use UTF-8 encoding and the following structure (semicolon-separated, no header row):
Sprinklers;SPR
Hydronic;S
Sanitary;S
Supply Air;V
Exhaust Air;V
Doors;D
Windows;W
Each line maps an original value (left) to the desired replacement (right).
Step 4: Transfer Parameters
Once you have configured your mappings and optional renaming rules:
- Click [OK] to apply your parameter transfer settings.
- Click [OK] again in the main ConVoid dialog to start the creation/update process.
- After the process completes, all configured parameters will have been transferred to the openings.
Parameter values are not updated automatically when host or reference elements change. Every time your linked models are updated or elements are modified, you need to re-run the creation/update process to refresh the transferred parameter values on your openings.
Verify Your Results
After the transfer completes, verify that the values were written correctly:
- Select an opening in Revit and check its properties panel. The target parameters should now contain the transferred values.
- For openings that penetrate multiple hosts or have multiple reference elements, check that the separator is working as expected (e.g.
EI30/EI60for fire ratings of two walls). - If a target parameter is still empty, confirm that the source element actually has a value for the selected source parameter.