Plan Check (Visibility and Tagging)
Introduction
Before you deliver a 2D plan, you need to confirm that every opening is both visible and tagged. Missing openings or missing tags are among the most common issues in opening coordination and can lead to costly errors on site.
The Plan Check tool scans a 2D view and highlights openings that are not visible or not tagged. It gives you a clear overview so you can fix problems directly instead of checking each opening manually.
Video Tutorial
Plan Check
Open the Plan Check tool from the [conclass] ribbon tab.
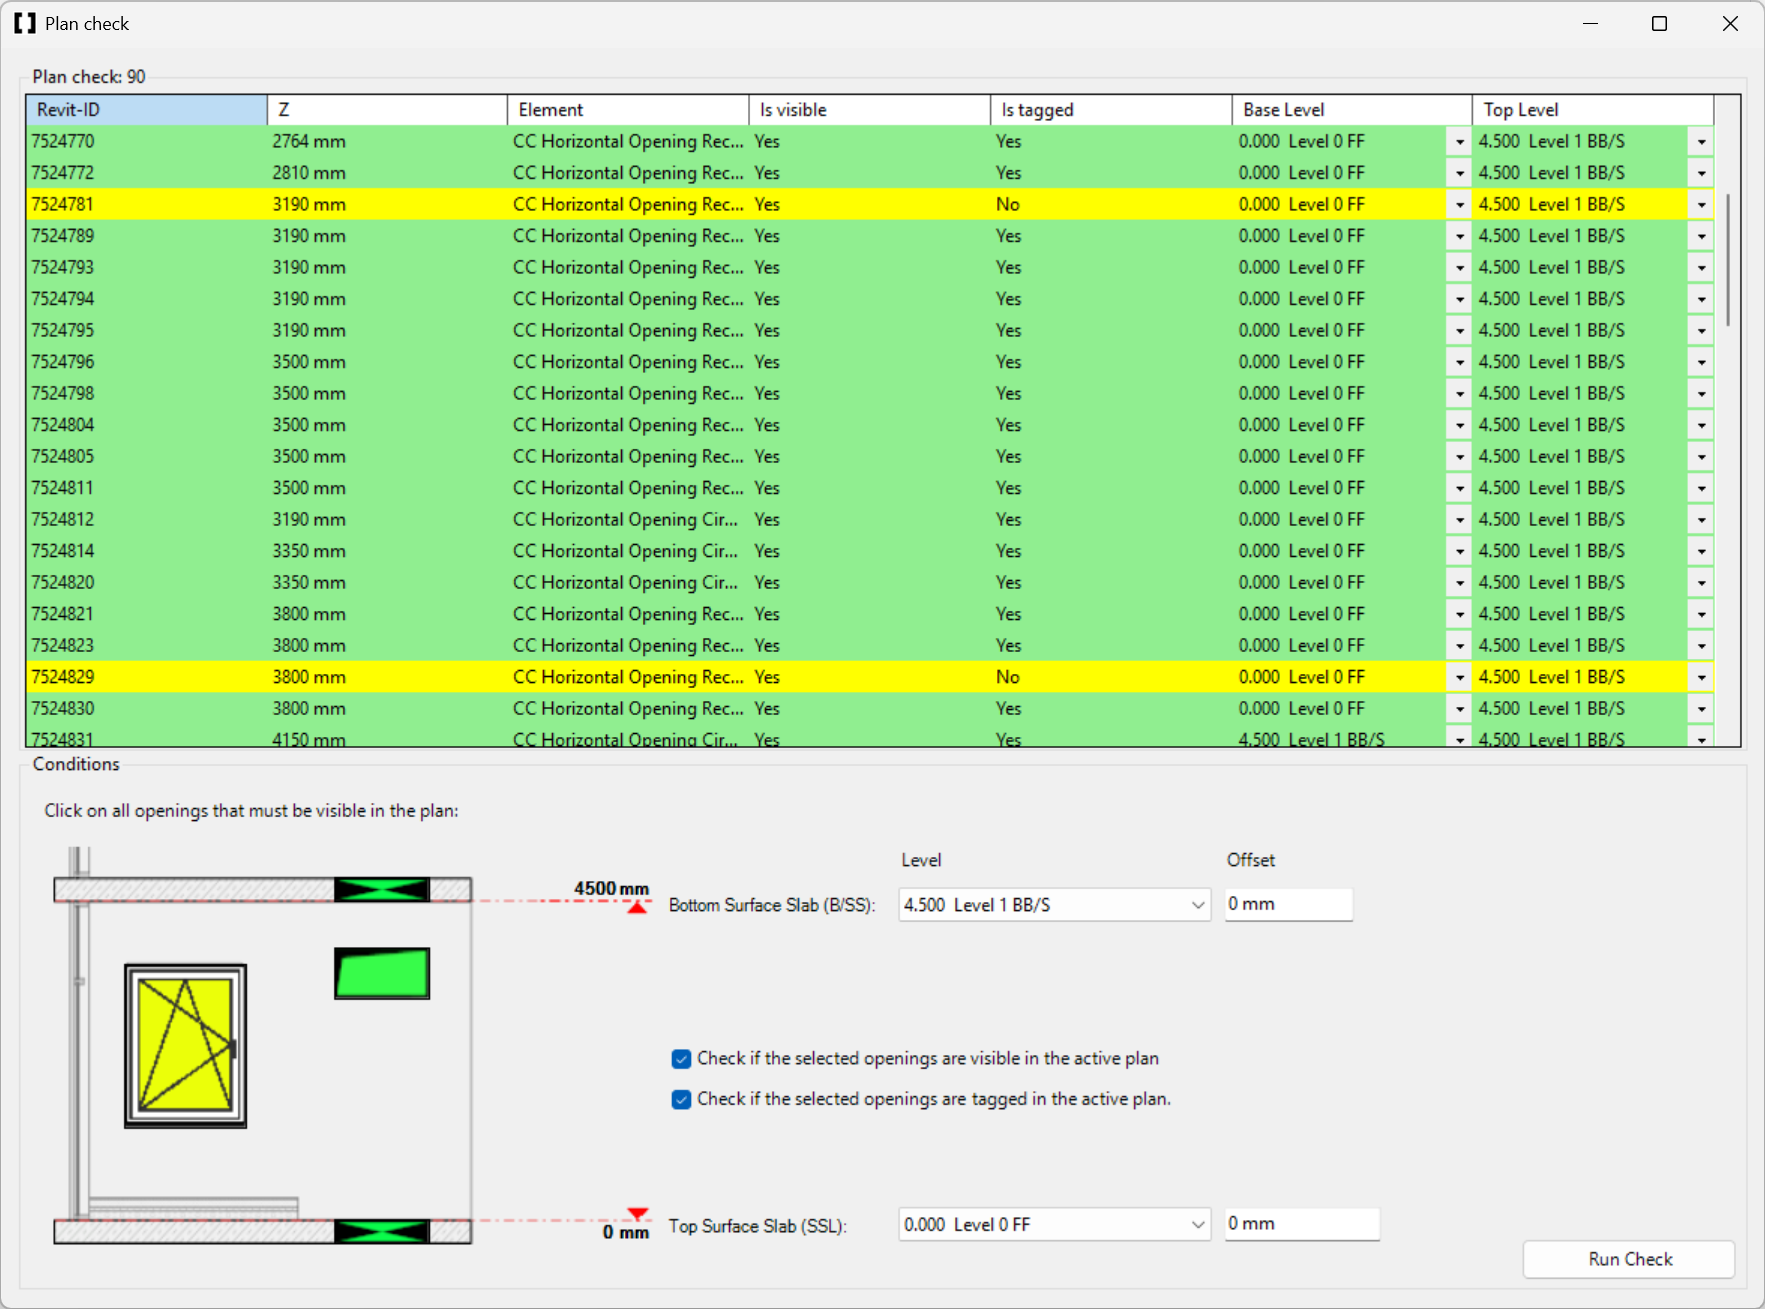
The Plan Check dialog opens, showing all openings that fall within the selected level range.
Step-by-Step
-
Start the Plan Check tool from the [conclass] ribbon tab.
-
Select the openings to check. Use the green and yellow checkboxes in the bottom-left corner to mark openings as either visible or hidden in the current 2D view. Green-highlighted openings should be visible in the current view; yellow-highlighted openings should not.
-
Set the Base and Top Level. Select the levels that represent the bottom and top surfaces of the slabs. If the desired level is not available, select a different level and add an offset.
-
Choose what to check. Enable or disable the checkboxes for visibility check, tag check, or both.
-
Click [Run Check] to start the analysis.
-
Review the results. Openings that did not pass the check are highlighted in yellow in the table.
-
Fix visibility issues. If an opening is not visible (or visible on the wrong floor), adjust the Base and Top Level. You can change the level directly in the dropdown inside the Plan Check table.
-
Verify success. Once all conditions are met for an opening, its row turns green.
-
Fix tagging issues. If an opening is not tagged, double-click its row to navigate to it in the view. Tag it manually or use the Smart Tag feature.
Verify Your Results
After fixing all issues, click [Run Check] again. All rows should now be green, confirming that every opening in the view is both visible and tagged.