Advanced Settings
The ConVoid settings control how openings are created, adopted, and updated. Choosing the right values avoids unwanted openings, incorrect shapes, and unnecessary status changes. This chapter explains every option and its effect per workflow.
Open ConVoid, select your Opening Filter, then click the Toolbox icon next to the Refresh button. Each filter stores its own settings independently.
The ConVoid settings are sensitive. Start with the recommended values for your workflow and only change them deliberately. Switch the tab below to see the defaults for your workflow.
Settings at a Glance
The dialog has four sections. Most issues come from the Element Filter and Limits sections, so read those carefully.
| Section | What it controls | Typical action |
|---|---|---|
| Manage | When ConVoid resets the approval status after a change. | Keep defaults; adjust tolerance values only if minor geometry changes create noise. |
| Elements | How ConVoid interacts with host and reference elements (cutting, constraints, parallel elements, adoption). | Enable or disable based on your workflow. Main source of duplicate or missing openings. |
| Element Filter | Which elements are included in the calculation, based on visibility in a reference 3D view. | Leave both checkboxes enabled unless you deliberately want to exclude elements. Main cause of "all openings deleted" issues. |
| Limits | Size thresholds, round-to-rectangular conversion, join distance, angle, slope, rounding. | Adjust per workflow. Values differ strongly between creation and adoption. |
Switch the tab below to load the recommended defaults for your workflow. This selection is kept in sync across every tabbed block on this page.
- Workflow A: Create Openings
- Workflow B: Adopt Openings
- Workflow C: Structural Openings
Video Tutorial
- Workflow A: Create Openings
- Workflow B: Adopt Openings
- Workflow C: Structural Openings
No dedicated video available for Workflow C. The settings logic is identical to Workflow B; see the adoption video above.
Manage
The Manage settings control when ConVoid resets the approval status of openings after changes. They apply to all workflows.
- Workflow A: Create Openings
- Workflow B: Adopt Openings
- Workflow C: Structural Openings
Reset approval status of openings when changes occur
When enabled, ConVoid sets the approval status to "Pending" whenever a geometric change is detected. Leave this on so reviewers see which openings need re-approval. Disable it only if you intentionally want changes to pass through without a new review cycle.
Openings won't be marked as changed if change in dimensions is less than
Tolerance for minor dimension changes. Below this value, the status stays "Up to date" and the approval status is not reset.
Openings won't be marked as changed if change in location is less than
Same principle for location changes. Useful to suppress noise from minor model adjustments.
Elements
The Elements settings control how ConVoid interacts with host and reference elements. Some options apply only to specific workflows; settings that are dimmed below do not apply to the selected workflow.
- Workflow A: Create Openings
- Workflow B: Adopt Openings
- Workflow C: Structural Openings
Cut openings with Hosts
Applies to: Workflow B (Adopt Openings)
When enabled, ConVoid cuts the opening into the host element during adoption. Not recommended. Cut openings with the ConVoid Manager only after the coordination and approval process is finished. This option also does not work with linked or IFC elements due to Revit limitations.
Create a constraint between openings and Hosts
Applies to: Workflow B (Adopt Openings)
Creates a constraint between opening and host (e.g. a wall). If the wall thickness or position changes, the opening follows automatically.
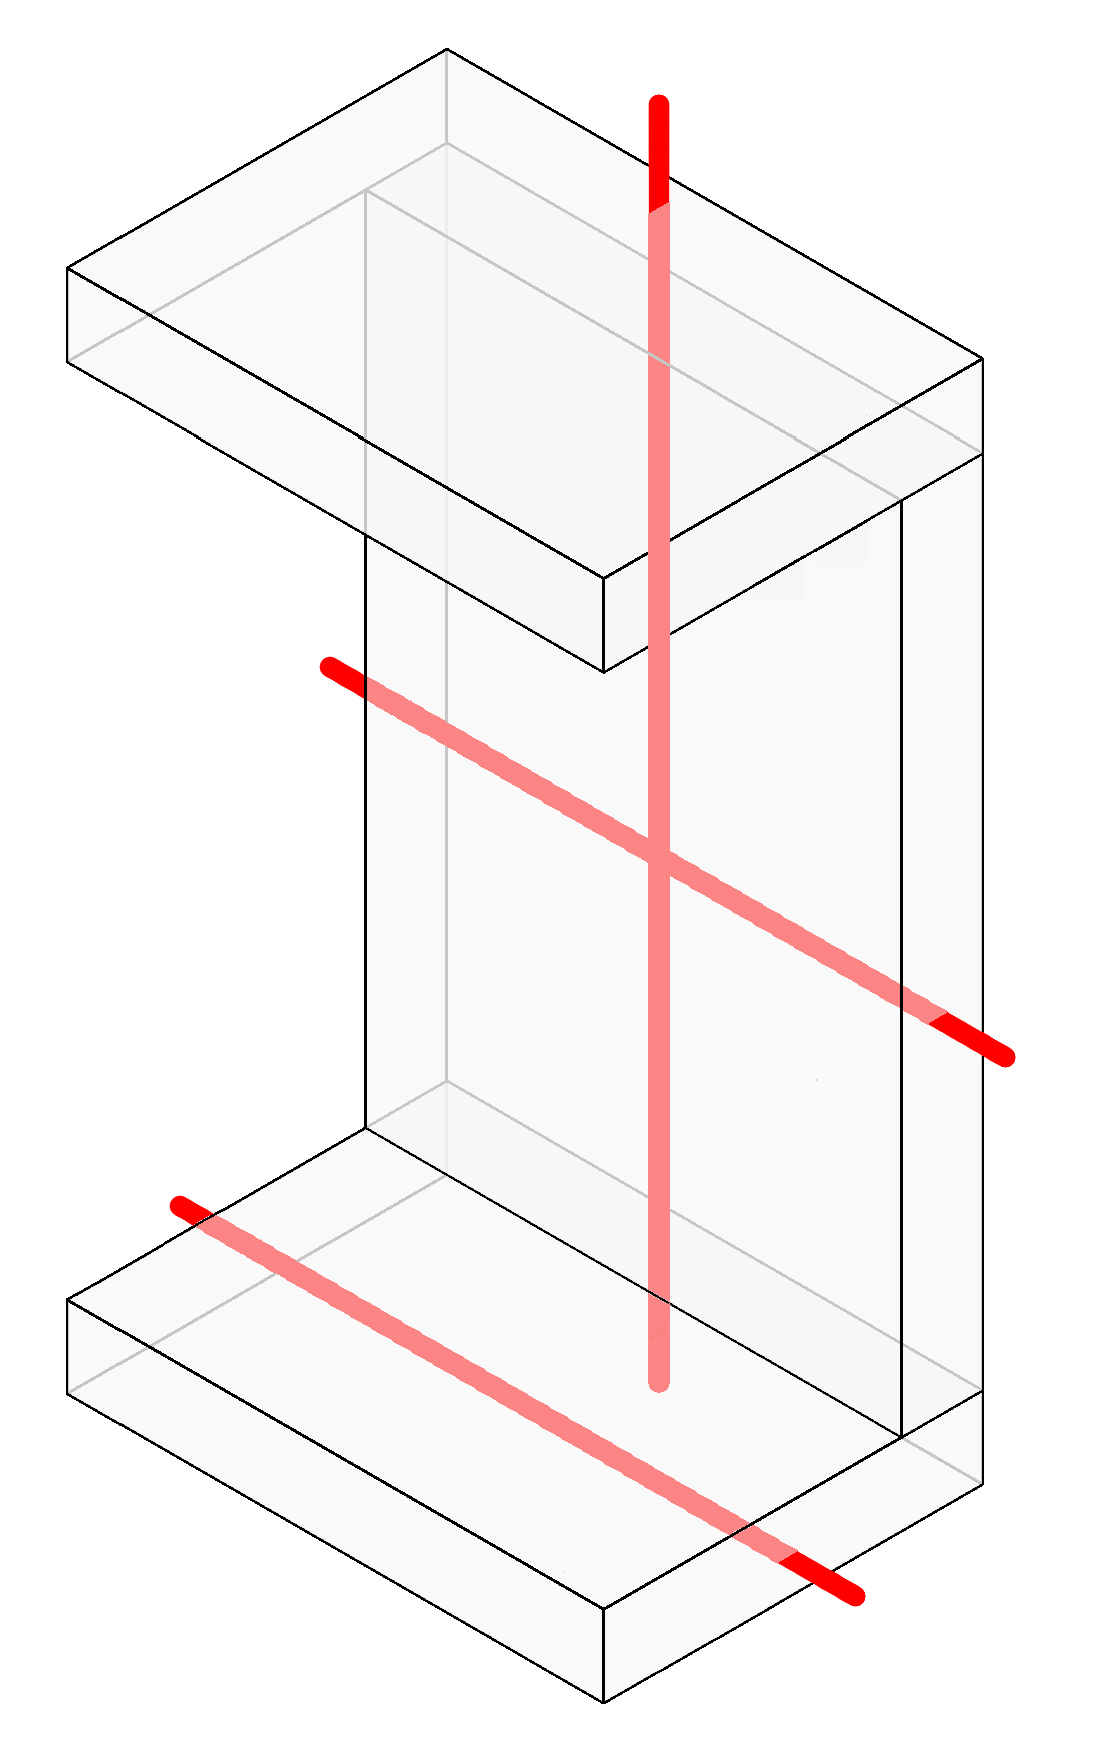
Create vertical openings if Reference and Host Elements are parallel
Applies to: Workflow A (Create Openings)
By default, ConVoid ignores reference elements running parallel to the host (e.g. a horizontal duct along a floor). Enable this if you need vertical openings for parallel elements, such as vertical cable trays intersecting a wall.
Create horizontal openings if Reference and Host Elements are parallel
Applies to: Workflow A (Create Openings)
Same logic, but for horizontal openings. Enable it for horizontal pipes that must pass through a floor.
Enabling parallel openings can create unwanted openings where elements barely touch a host surface. Review the results after enabling.
Adopt Provision for Voids (Openings) from linked Model
Applies to: Workflow B (Adopt Openings)
Always enable this option when adopting openings from a linked model. It creates the link between the linked opening and your adopted opening, which is essential for approval and coordination tracking. Leaving it off causes wrong shapes and sizes on adoption.
In Workflow A (Create MEP Openings), leave this off. Enabling it while creating from MEP can produce two openings in the same place.
Element Filter
The Element Filter controls what ConVoid includes in its calculation. Misconfiguring it is the single most common cause of the "all openings marked as Deleted after update" support case.
- Workflow A: Create Openings
- Workflow B: Adopt Openings
- Workflow C: Structural Openings
ConVoid uses two different views for two different purposes. Understanding the difference prevents most errors:
| Where (Active View) | What (Reference View) | |
|---|---|---|
| Question it answers | In which area of my project should ConVoid calculate? | Which elements should ConVoid use for the calculation? |
| How you set it | Activate the section box in your current 3D view before starting ConVoid. See Define the Creation Scope. | Select a separate 3D view in the Element Filter dropdown and disable one or both checkboxes. |
| What it controls | The spatial boundary. Only elements inside the section box are processed. | Element visibility. Only elements visible in the selected reference view are processed. |
| Typical use case | Limit calculation to one floor or building wing to save time or isolate an error. | Exclude non-bearing elements (e.g. drywalls) or entire linked models from the calculation. |
By default, both checkboxes are enabled and no reference view is selected. ConVoid then uses all host and reference elements in the project, regardless of visibility. If you are unsure, keep both enabled.
Include Host Elements not visible in the selected view / Include Reference Elements not visible in the selected view
These two checkboxes only take effect when a 3D view is selected in the dropdown. They let you exclude elements from the calculation by hiding them in the reference view:
| Checkbox | Enabled (default) | Disabled |
|---|---|---|
| Include Host Elements not visible | ConVoid uses all host elements (walls, floors, etc.), even if hidden in the reference view. | ConVoid ignores host elements hidden in the reference view. Use this to exclude non-bearing walls like drywalls. |
| Include Reference Elements not visible | ConVoid uses all reference elements (pipes, ducts, etc.), even if hidden in the reference view. | ConVoid ignores reference elements hidden in the reference view. Use this to exclude specific MEP categories or linked models. |
Set Up a Reference 3D View
- Create a dedicated 3D view for ConVoid. Do not use your working view.
- Hide the elements you want to exclude using filters, categories, or manual hiding.
- Make sure the entire project is visible and the section box is deactivated in this view.
- Switch to a different view to start ConVoid.
- In the Element Filter settings, select your dedicated 3D view in the dropdown.
- Disable one or both checkboxes to exclude hidden elements.
- Run the creation or update process.
Any visibility change in the reference 3D view changes what ConVoid calculates. Avoid modifying this view during normal work. If a colleague hides a linked model or changes a filter here, ConVoid will treat those elements as excluded on the next run, which often shows up as openings being marked as "Deleted".
Include Host Elements in Demolished Phase
Disabled by default. Enable only if you need openings in host elements that are in the demolition phase.
Limits
The Limits section controls the size, shape, joining, and rounding behavior of openings. Values differ strongly between workflows; the dialog above loads the right defaults.
- Workflow A: Create Openings
- Workflow B: Adopt Openings
- Workflow C: Structural Openings
Ignore openings smaller than
ConVoid will not create openings if Width, Length, Height, or Diameter are less than this value. Set a reasonable minimum for your workflow. For adoption (Workflow B), set this to 1 so no opening from the linked model is skipped.
Round openings become rectangular if diameter is greater than
Openings with a diameter above this value are created as rectangular instead of round. Example: with 200 mm, all round openings above 200 mm become rectangular. For adoption (Workflow B), use a high value like 9999 mm to preserve the original geometry. You can also change the shape manually after creation.
The threshold is calculated on the raw opening edges, not including oversize. If you have an oversize of 50 mm on each side, add it to the value. Example: 100 mm opening + 50 mm + 50 mm = 200 mm total.
Join openings at a distance of
Distance at which multiple openings are automatically joined into one. A typical value for MEP (Workflow A) is 100–200 mm. For adoption (Workflow B), keep this at 0 to adopt each opening individually as designed in the source model. You can also join or unjoin openings manually after placement.
The join distance is measured between the raw opening edges, not including oversize. Add the oversize on both sides to the value. Example: 100 mm join distance + 50 mm + 50 mm = 200 mm total.
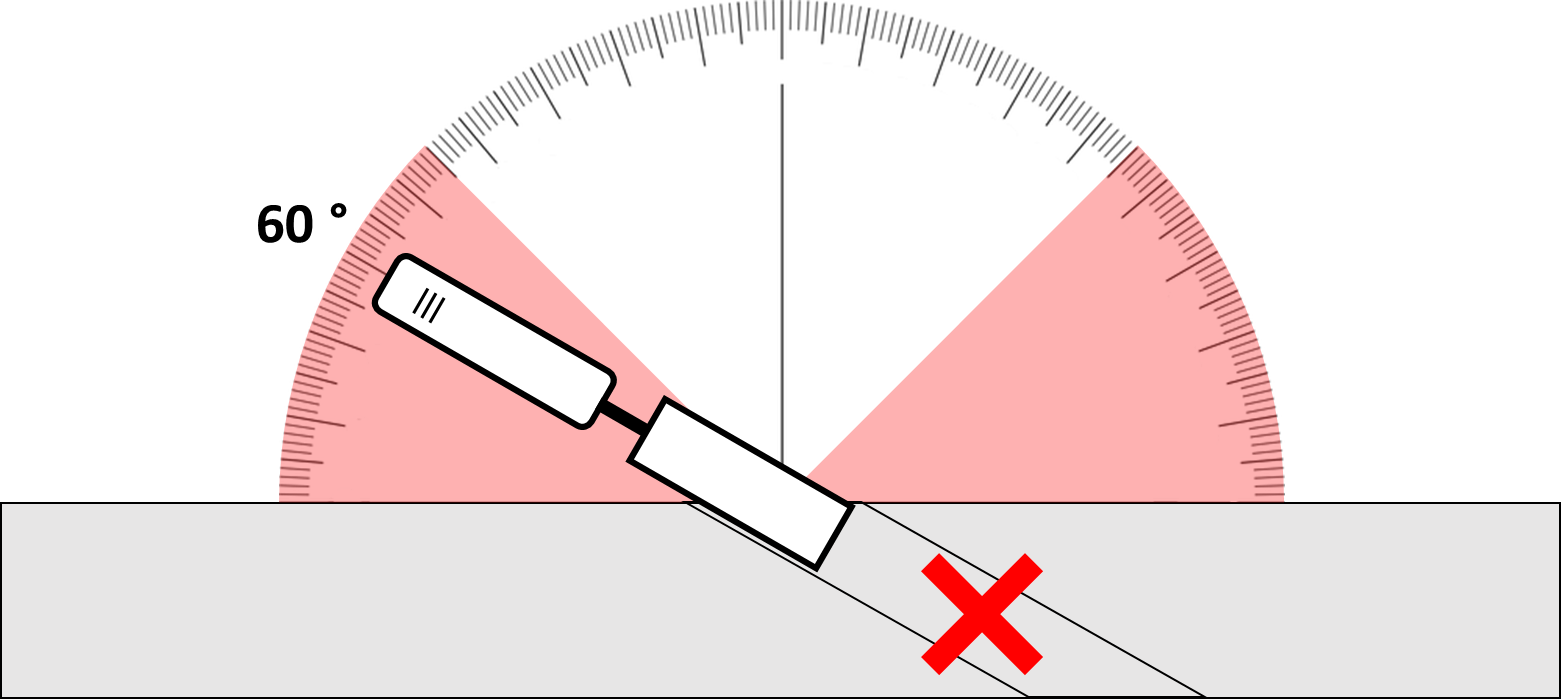
Ignore openings with an angle greater than
Ignores reference elements that intersect the host at a steep angle. The main purpose is to prevent openings where a drilling machine cannot be placed.
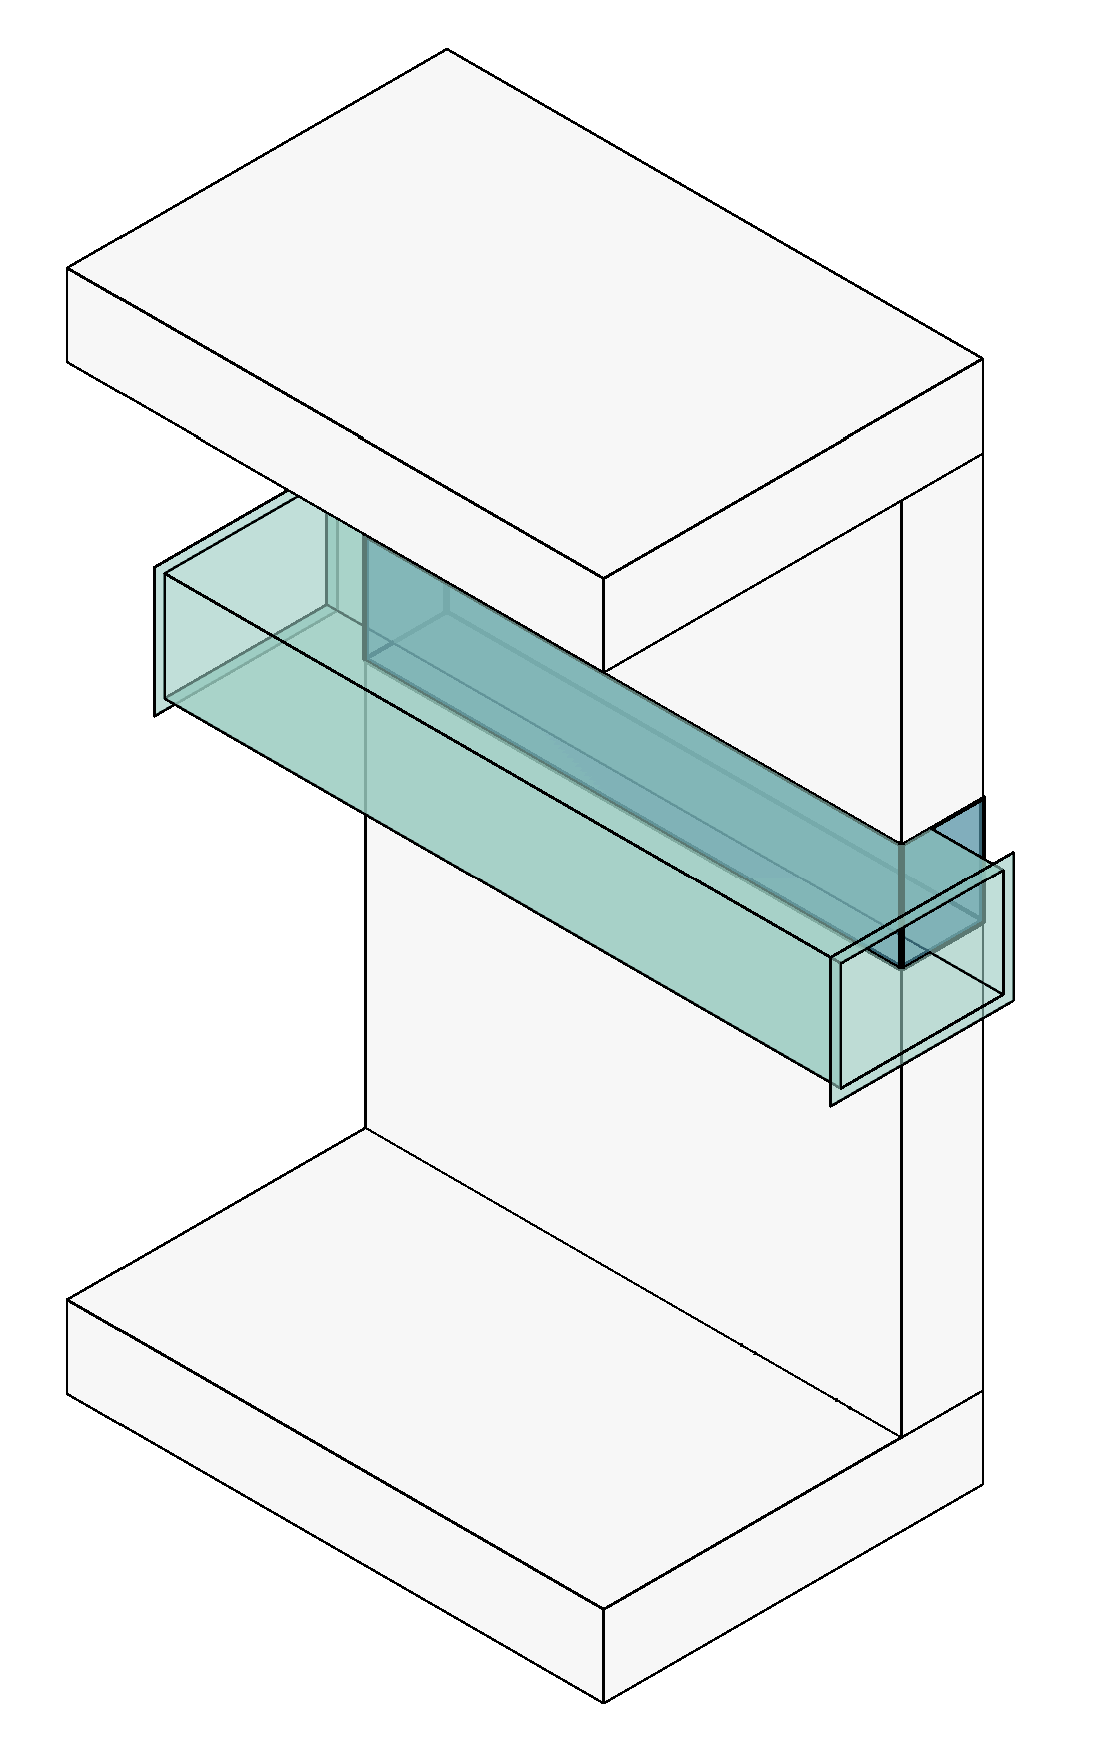
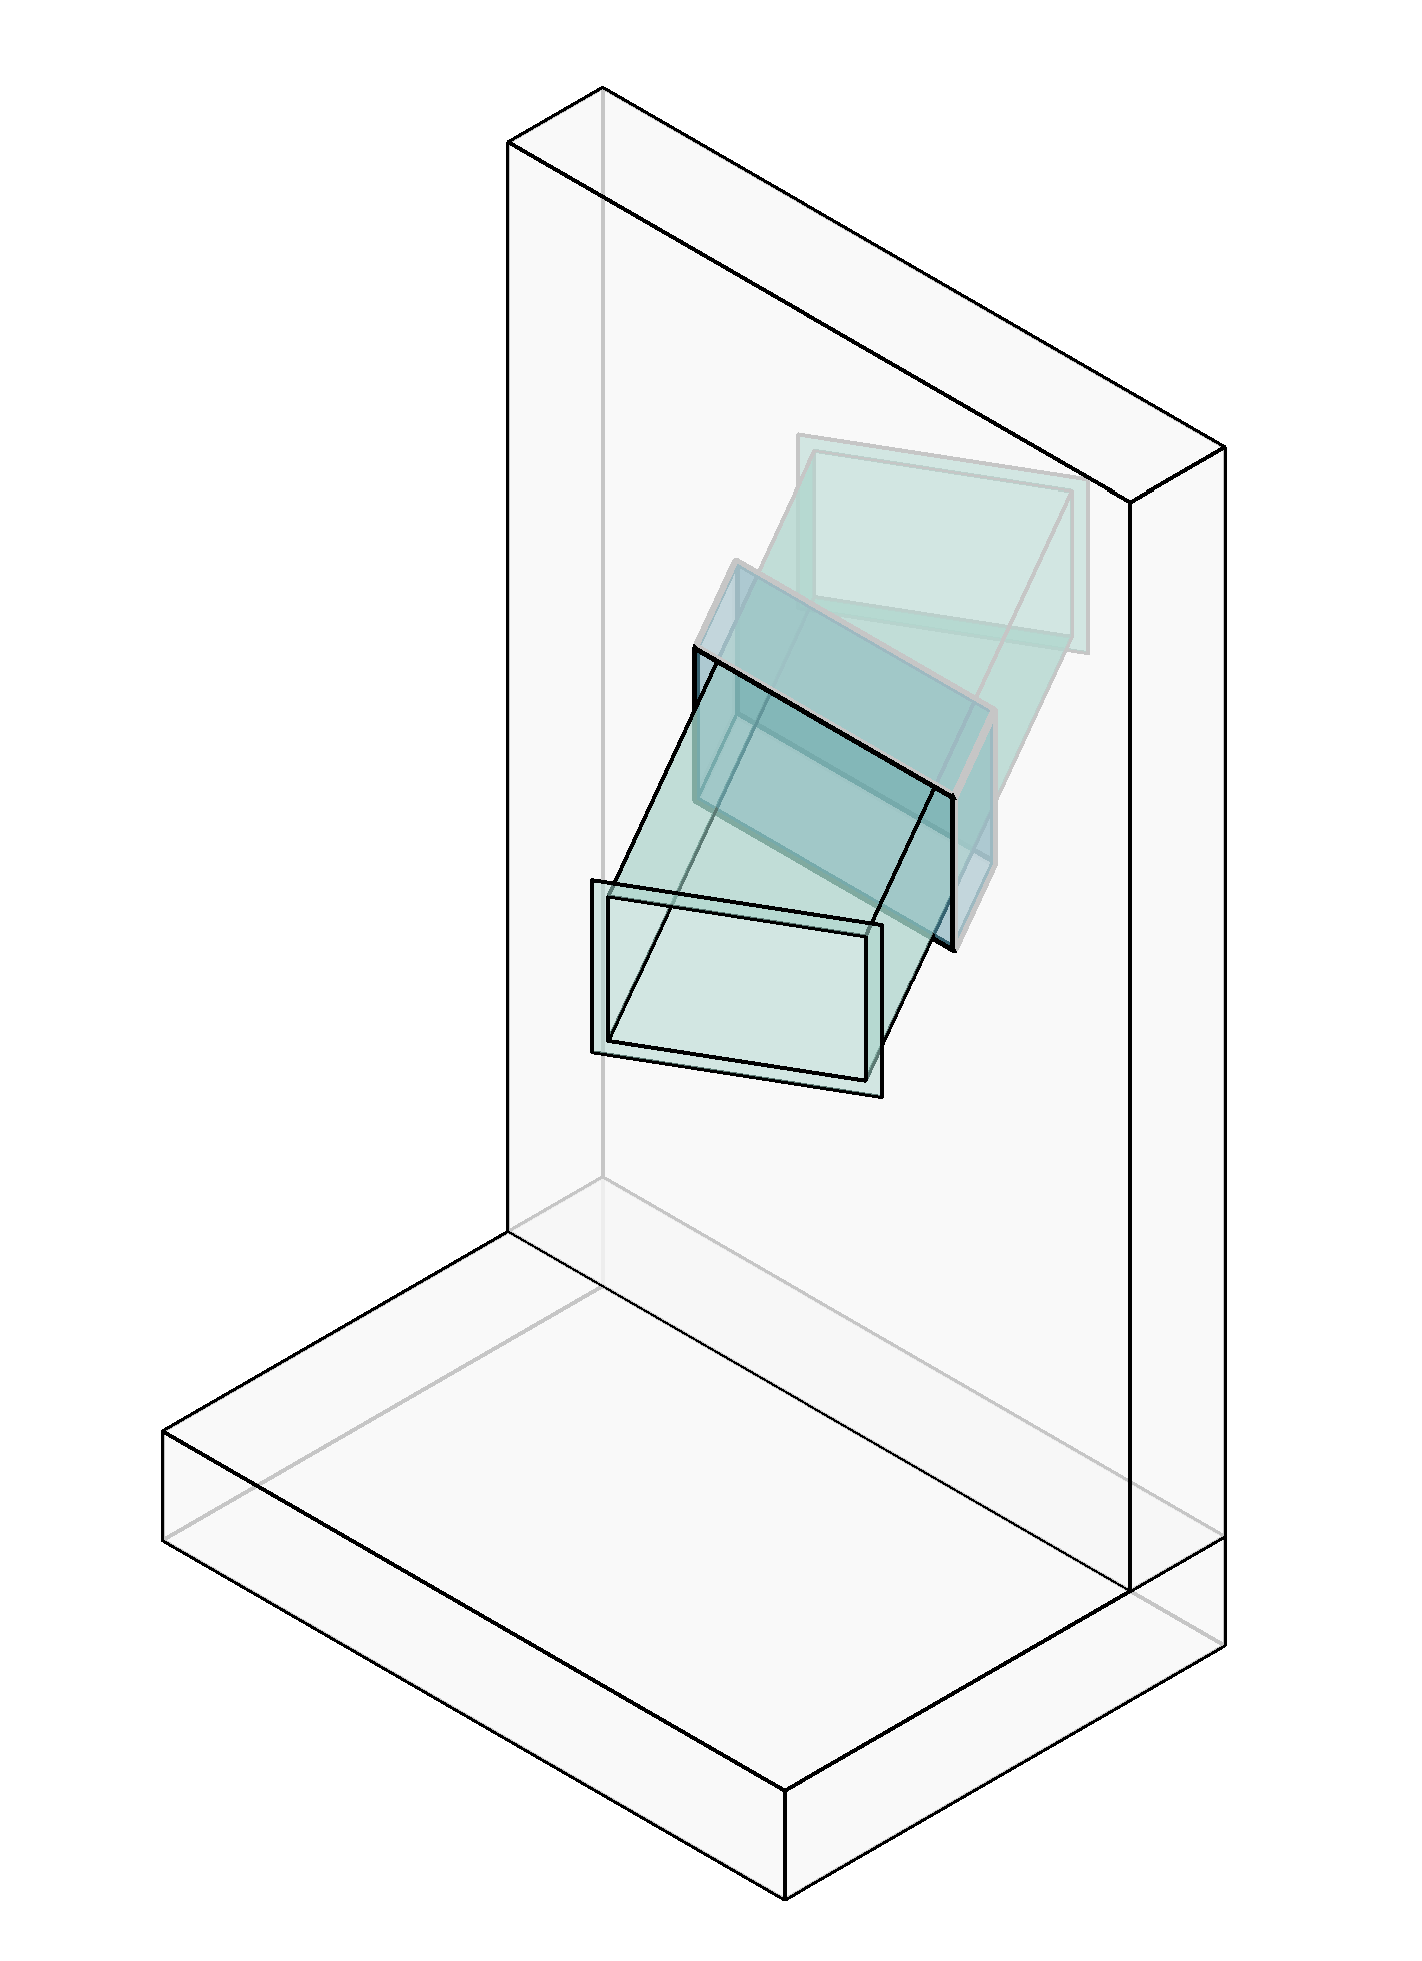
Create openings with a slope
When enabled, ConVoid rotates openings in X, Y, and Z to match the angle of the reference element. When disabled, openings are created straight (perpendicular to the host).
Round up opening dimensions
Rounds the total opening dimensions up to the chosen value to avoid odd numbers. Example: a value of 10 mm rounds a 153 mm opening to 160 mm. For finer control per category, use Sizing and Oversizing (Dimension Void) instead.