Workflow A: Create MEP Openings
In this chapter you will learn how to automatically create openings for MEP services (ducts, pipes, cable trays) by configuring Opening Filters, selecting reference and host elements, running a clash detection, and placing the openings.
This is the core workflow for MEP engineers. By the end, you will have openings placed in your model ready for updating, oversizing, and coordination.
Before you start, make sure you have completed:
- Import ConVoid Families into your project.
- Link Revit and IFC Models that contain your MEP and structural/architectural models.
- Define the Creation Scope.
- Create and Change Your Profile.
Video Tutorial
User Interface Overview
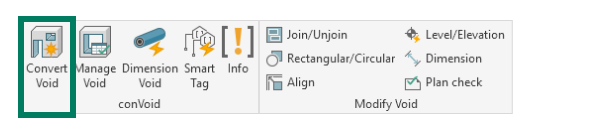
Open ConVoid from the Revit ribbon tab [conclass] > Convert Void.
The ConVoid main window contains all settings for a single Opening Filter. Each filter defines which MEP elements are checked against which structural/architectural elements, and under what conditions openings are placed.
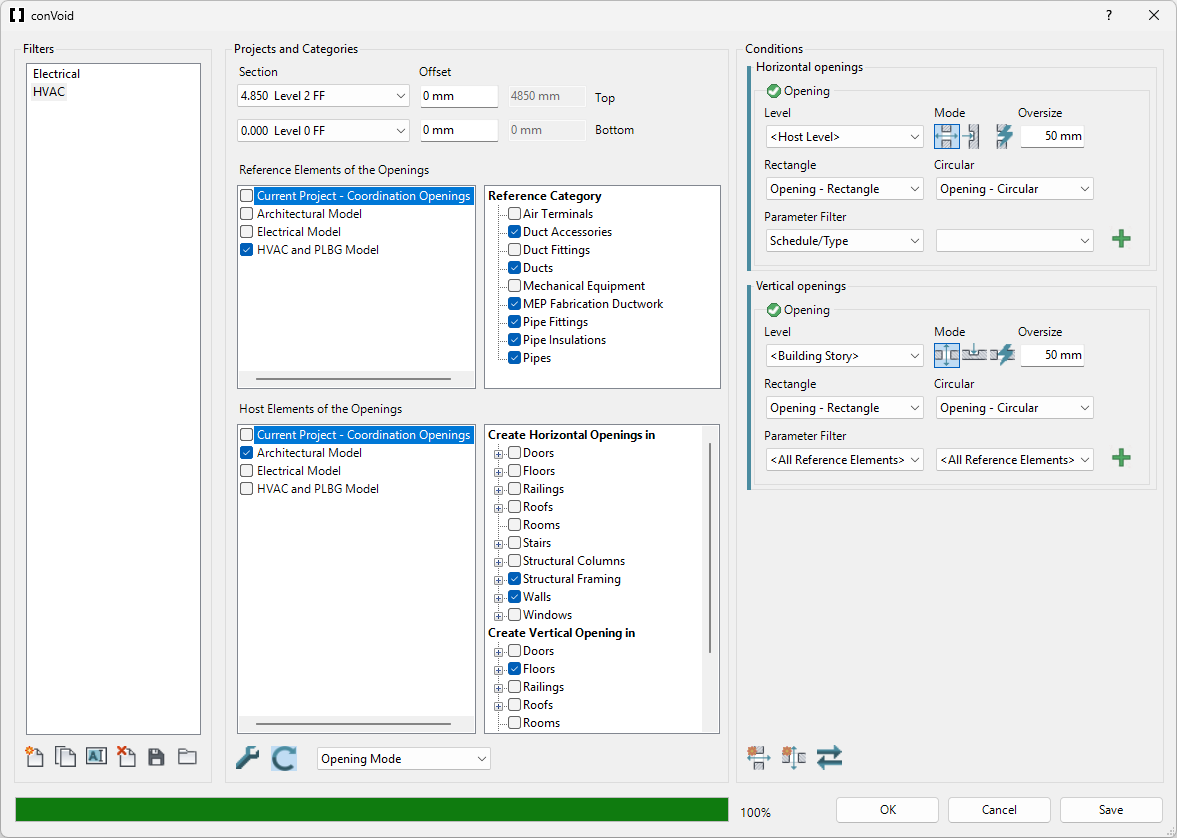
Step 1: Create an Opening Filter
An Opening Filter defines the scope and rules for one creation run. You can manage filters with these toolbar buttons:
| Icon | Action | Description |
|---|---|---|
| Create new filter | Creates a blank Opening Filter with default settings. | |
| Duplicate filter | Copies all settings of the selected filter. Useful when creating a second filter for another discipline. | |
| Rename filter | Give the filter a meaningful name, e.g. "Ventilation" or "Plumbing". | |
| Delete filter | Removes the selected filter permanently. | |
| Export filters | Saves all Opening Filters to an *.xml file for reuse in other projects. | |
| Import filters | Loads Opening Filters from an *.xml file into your project. |
To create openings for all MEP services at once, a single filter is enough. If you want to separate disciplines (e.g. HVAC and Electrical), create one filter per discipline. This example starts with a filter for the ventilation system. You can also Save and Load Settings to reuse filter configurations across projects.
Creating separate filters per MEP discipline (Ventilation, Plumbing, Electrical) prevents openings from different systems from joining automatically. Each opening stores a FilterId parameter, so you can filter and manage them independently in schedules and views.
Never create multiple filters that reference the same openings. This causes conflicts and may cause duplicate openings. Create one filter per discipline or system, not per level or zone.
Step 2: Import ConVoid Families
If the ConVoid families are not yet loaded, a prompt will appear asking you to import them.
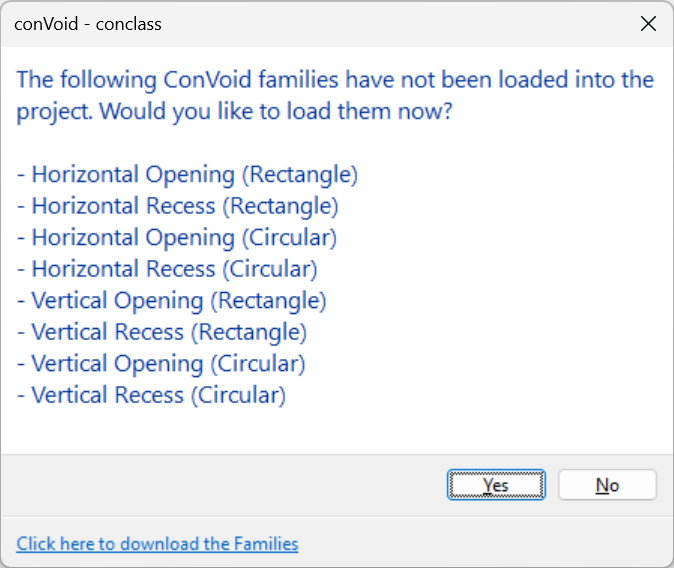
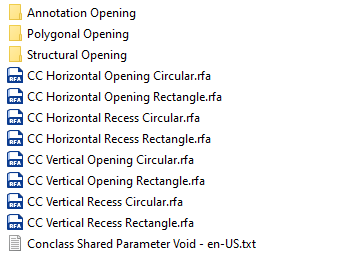
Click [Yes] and the ConVoid library folder will open. Import the families listed in the dialog. If you cannot find the library, download it here.
If you followed the Import ConVoid Families chapter earlier, the families are already in your project and this dialog will not appear.
Step 3: Set the Creation Scope
Define the upper and lower levels (and optional offset) between which ConVoid will create openings. If you activated the Section Box in a 3D view, this option is grayed out because the scope is already defined by the section box. For more details, see Define the Creation Scope.
For projects with more than 2,000 openings, process in batches using a 3D section box to limit the scope. ConVoid performs best with approximately 2,000 openings per run.
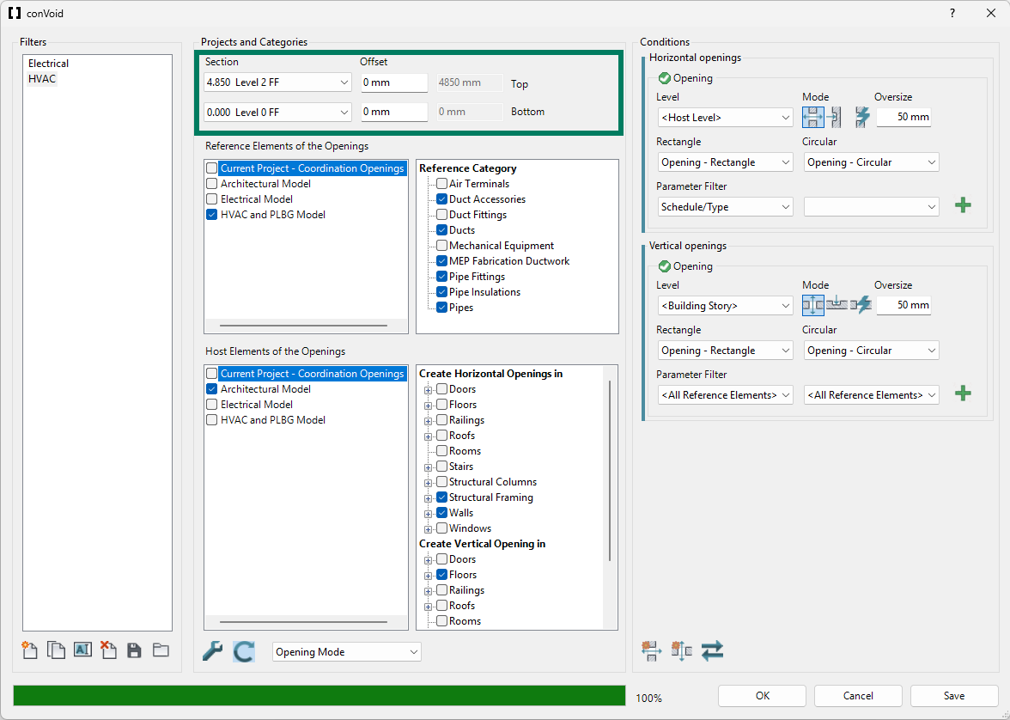
Step 4: Select Reference Elements
Reference Elements are the MEP elements that penetrate the structure, such as ducts, pipes, cable trays, and insulation.
Select the project(s) containing your MEP models, then choose the relevant categories. Common categories include Cable Trays, Ducts, Pipes, their Accessories, and Insulations.
Begin with the main categories (Ducts, Pipes, Cable Trays, and their Accessories) and add Fittings or other categories later. This keeps the first run manageable and helps you understand the results. If you want to exclude certain MEP service elements from the process, you can Exclude Elements by a 3D View.
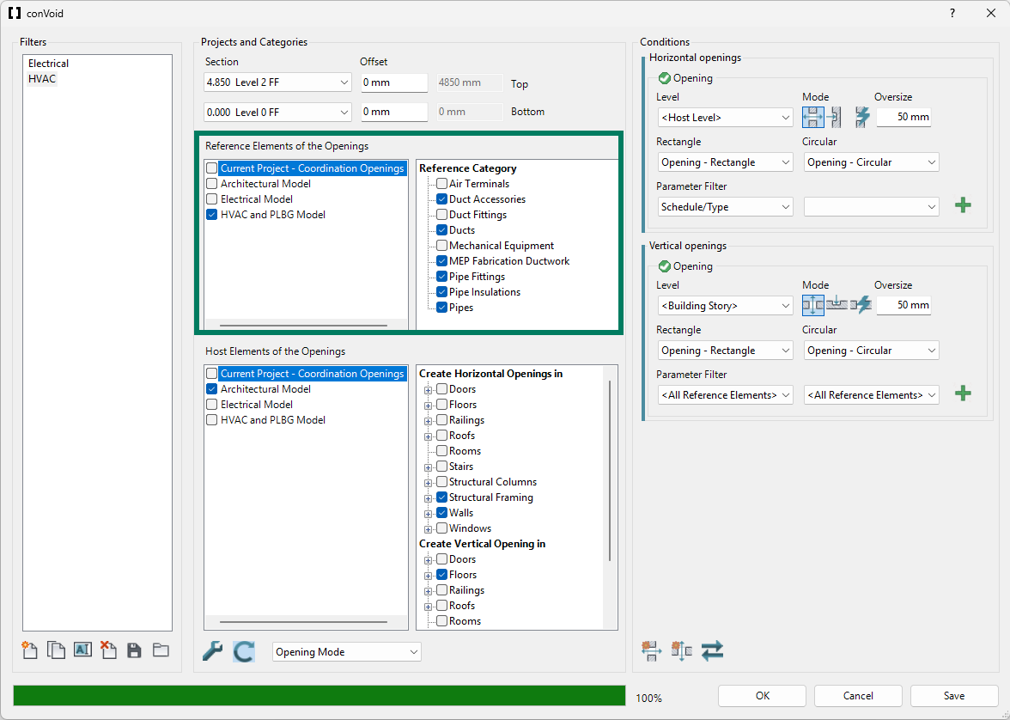
ConVoid supports all Revit categories including MEP Fabrication Parts. However, insulation of MEP Fabrication Parts is not a native Revit category and cannot be extracted via the Revit API. To account for fabrication insulation, use the Sizing and Oversizing feature to add the insulation offset manually.
Step 5: Select Host Elements
Host Elements are the structural/architectural elements that receive the openings, such as walls, floors, beams, and roofs.
Select the project(s) containing your structural or architectural models, then choose the host categories:
-
Horizontal openings (wall openings): Walls, Structural Framing, Structural Columns, etc.
-
Vertical openings (floor openings): Floors, Roofs, Stairs, etc.
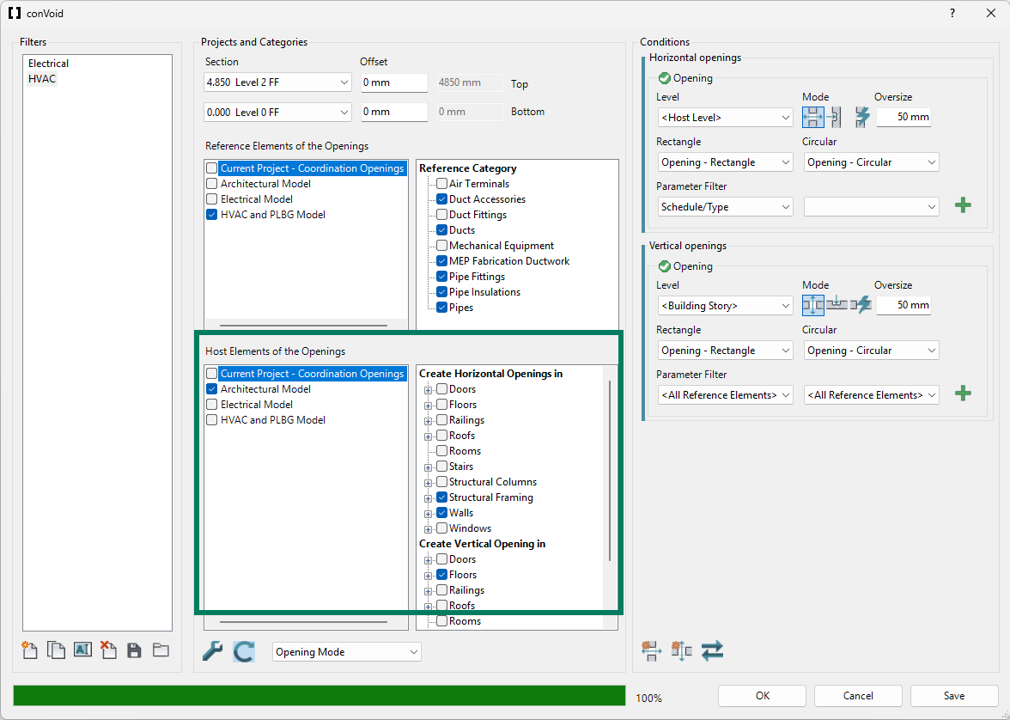
You can click the plus sign (+) next to a category to limit the creation to specific family types. If no types are selected, ConVoid uses all elements in that category. However, we recommend using the Exclude Elements by a 3D View feature instead, as it gives you more control and is easier to manage across updates.
Step 6: Settings
Click the Toolbox icon to open the ConVoid settings. For your first run, the default settings work well. The settings are covered in detail in Advanced Settings.
Step 7: Run Clash Detection
Click the Refresh button to start the clash detection between the selected Reference and Host categories.
Whenever you change Reference or Host categories, you must click Refresh again before proceeding. The highlighted Refresh button indicates that settings have changed and the clash detection is outdated.
Step 8: Define Conditions
Once the clash detection is complete, the Conditions section becomes active.
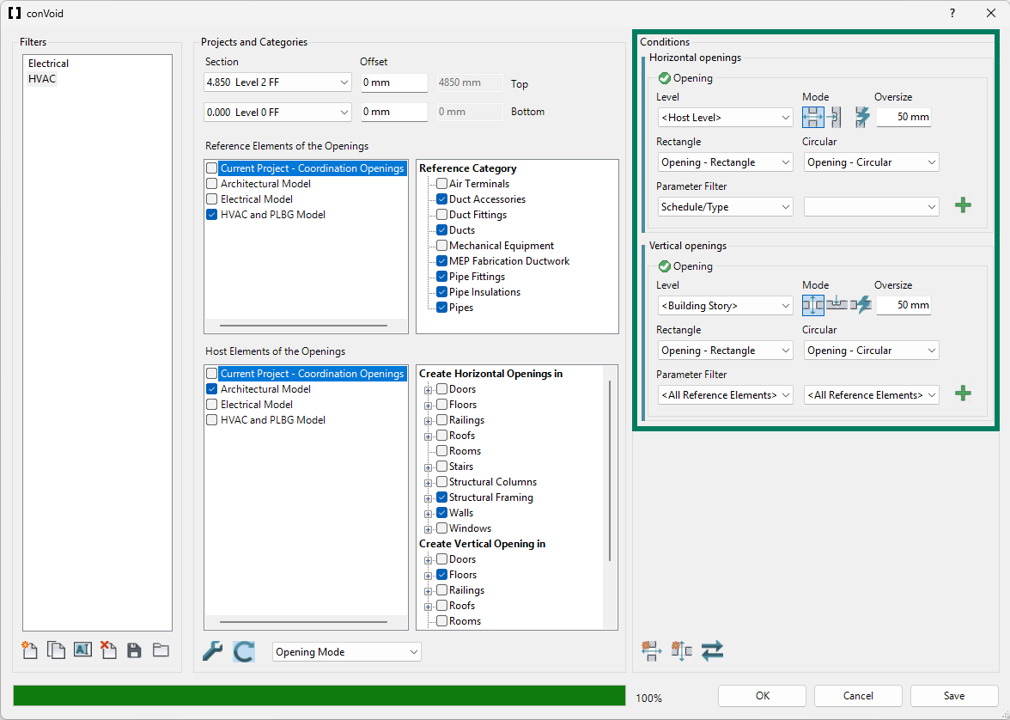
Level for Horizontal Openings
Select Host Level. The openings will follow the base and top levels of the host wall, which provides the best results.
Other options: Building Story (nearest story levels), Reference Level (level of the MEP element), Specific Level (a fixed level you choose).
Level for Vertical Openings
Select Building Story. The openings will be constrained to the nearest upper and lower building story.
Other options: Host Level (level of the floor), Reference Level (level of the MEP element), Specific Level (a fixed level you choose).
Creation Mode
Choose how ConVoid handles the intersection between reference and host elements:
| Icon | Mode | Illustration | Description |
|---|---|---|---|
| Opening | 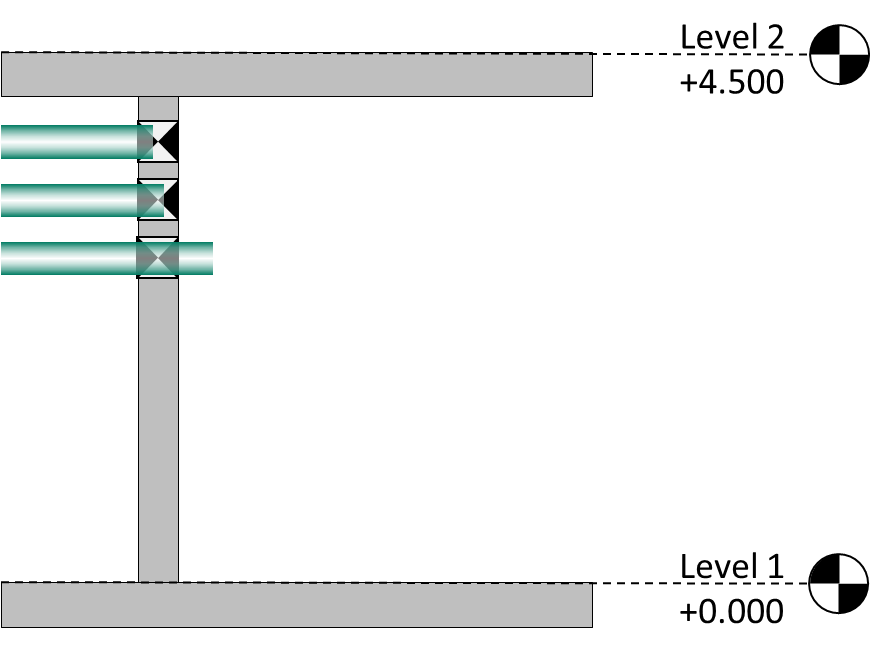 | Always creates a full penetration through the host element, even if the MEP element does not fully intersect it. Recommended for your first run. | |
| Recess |  | Creates a recess if the MEP element does not fully penetrate the host. If it does penetrate, a full opening is created. | |
| Auto | 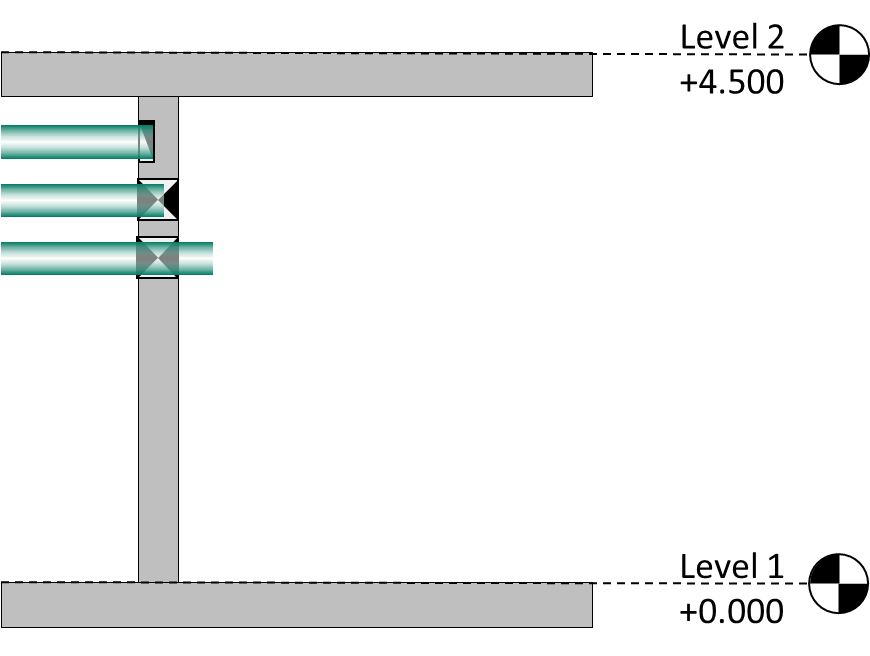 | ConVoid automatically decides between penetration and recess based on geometry. |
If you see multiple overlapping openings at the same location, check that you are using Opening mode, not Auto. Auto mode can create duplicates in some cases.
Opening Families
The rectangular and circular opening families are automatically selected. You can duplicate or rename ConVoid families to create new types. See Family Overview for details.
Oversize
Set a minimum oversize to keep clearance between the MEP services and host elements. To apply different oversizes per discipline or category later, use the Sizing and Oversizing feature.
Parameter Filter
Select <All Reference Elements> to include all detected clashes. This is the recommended setting for most projects. If you need different oversizes per category, apply them afterwards using the Sizing and Oversizing (Dimension Void) feature.
To limit the run to a specific subset (e.g. only "Supply Air" elements), select a parameter like "System Classification" and set the value accordingly. The green indicator shows the approximate number of openings that will be created.
Add Opening Types
[Add horizontal opening type] adds another horizontal opening configuration (e.g. for wall openings with different families or settings).
[Add vertical opening type] adds another vertical opening configuration (e.g. for floor openings with different families or settings).
Step 9: Start the Creation Process
Click [OK] to start placing the openings. ConVoid will automatically create and position all openings in your project. All settings are saved automatically when you click [OK].
The openings appear as symbols in 2D views and as solids in 3D views. You can customize which symbol is displayed per family type. See Family Symbols for details.
After the creation process, review the result summary. Check that the number of created, changed, and deleted elements makes sense. If the results look unexpected (e.g. too many openings marked as deleted), undo the creation immediately with Ctrl+Z and review your filter settings before running again.
Step 10: Add More Opening Filters
After the first run, you can add filters for additional disciplines (e.g. Plumbing, Electrical):
- Open ConVoid and create a new Opening Filter (or duplicate and rename an existing one).
- Select the relevant reference categories for the new filter.
- Run ConVoid again.
- Repeat as needed for each discipline.
Never create multiple filters that reference the same openings. This causes conflicts, duplicate openings, and tracking issues. Each MEP element should be covered by exactly one filter.