Make and Review Approvals
Why Approvals Matter
An opening is only useful when every discipline involved (Architecture, Structure, MEP, ...) agrees on its size and position. The approval workflow in the ConVoid Manager is how you record that agreement: each discipline approves, rejects or sets an opening to pending, and you can see at a glance which openings are coordinated and which still need work.
Before approving, make sure you have completed one of:
Video Tutorial
Step 1: Check Your Discipline
Every approval is stored against the discipline currently set in your Profile. If your profile says ARC but you are doing the MEP review, your approvals end up in the wrong discipline and overwrite the architect's work.
Open Void Manager → Profile and confirm the discipline before you click any approval button.
ConVoid does not ask which discipline you are approving as. It always uses the discipline from your profile. Always verify this before approving, especially after opening a model from a colleague.
Step 2: Open the ConVoid Manager
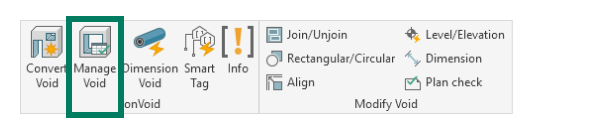
Open the conclass ribbon tab and click Void Manager.
The Manager opens with all openings of your project listed in the table.
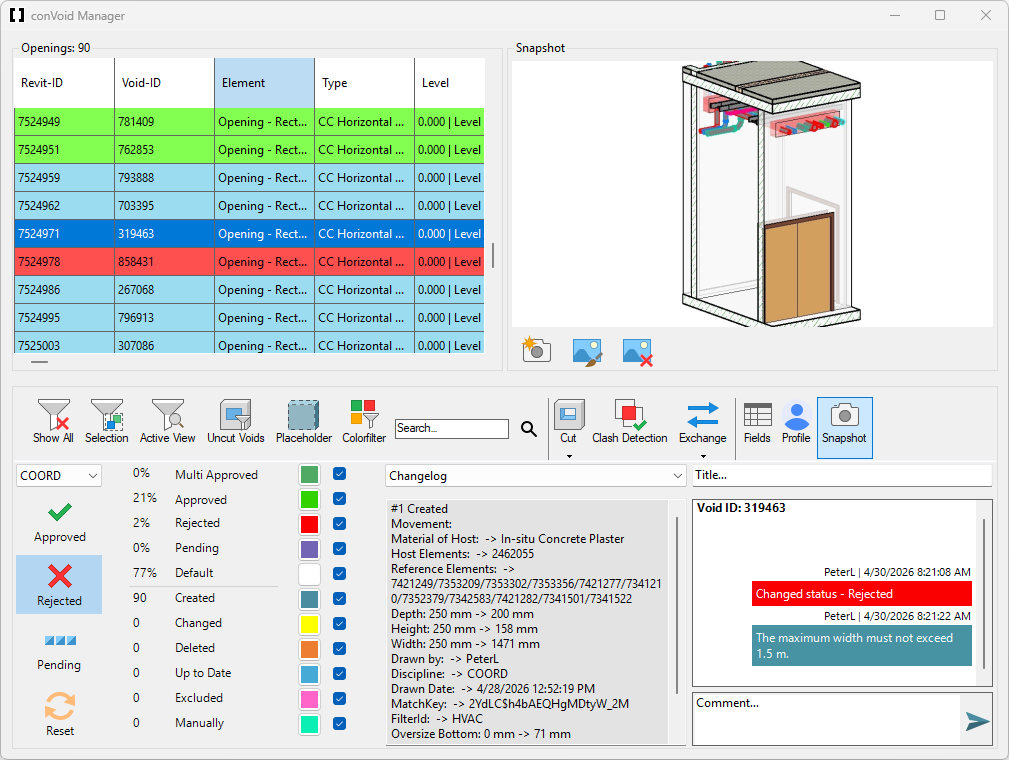
Selecting an opening in the model highlights it in the table, and the other way around. Multi-selection works in both directions. Double-click a row to navigate the active view to that opening.
Step 3: Approve, Reject or Set to Pending
Select one or more openings (in the table or in the view) and click the action you need.
| Icon | Action | When to use |
|---|---|---|
| Approved | The opening is correct in size and position. Set this once you have verified the geometry. | |
| Rejected | The opening is not acceptable as is. Add a short comment explaining what should change. | |
| Pending | You need more information before deciding. Add a comment with the question. | |
| Reset | Removes your approval entry for this discipline. Use sparingly. |
Reset only your own discipline. Resetting another discipline's status while your profile is set to that discipline overwrites their work and cannot be undone inside Revit.
Step 4: Set Titles, Make Comments and Snapshots
Approvals are clearer when each opening carries a meaningful title, a short comment, and a snapshot of the situation in your view. Titles and comments are stored on the element itself and in the *.bcf file, so other project participants receive them after the next save or synchronization. Snapshots are not stored in the Revit file. To share them directly with your team, set up a Shared Location.
Add a dynamic Title
By default ConVoid generates a title from the Void-ID (the Void-ID can be changed via the Mark Parameter). To change it, select one or more openings and type a new title in the title textbox, then press [Enter] to apply it.
You can include any parameter value by wrapping the parameter name in square brackets. This lets you build descriptive, consistent titles across a large multi-selection in one step:
- Input:
[Level]_[Shape][Orientation]_[Total Height]x[Total Width]: The Wall Opening intersects the Floor. - Output:
Level 1_Rectangle_Horizontal_200x300: The Wall Opening intersects the Floor.
The substitution is evaluated per opening, so each row in a multi-selection gets its own resolved title.
Add a Comment
Select one or more openings and type your message in the comment chatbox. Press [Enter] to post it. As with titles, the same comment is written to every selected opening.
Once a comment is posted it stays on the opening permanently. Re-read it before pressing [Enter], especially on a multi-selection.
Add a Snapshot
A snapshot is a small image attached to an opening, useful for showing exactly what a comment refers to (e.g. "the duct here is too close to the beam").
| Icon | Action | What it does |
|---|---|---|
| Snapshot | Opens the snapshot panel next to the schedule for the selected opening. | |
| Capture | Captures the current Revit view as a snapshot on the opening. | |
| Edit | Opens the snapshot in Paint so you can mark up arrows, notes or callouts. | |
| Delete | Removes the snapshot from the opening. |
Snapshots are saved locally, not inside the Revit model. To share them with the rest of the team you have two options:
- Send a
*.bcffile. See BCF Exchange. - Configure a shared folder so snapshots are mirrored there as well. Every team member must point to the same folder before they can see each other's snapshots.
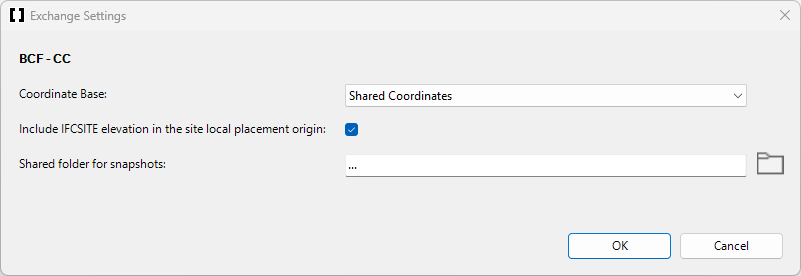
To configure the shared folder:
- Open the Exchange menu and click the expand arrow below it.
- Click Settings.
- Set the Shared folder for snapshots path. Repeat on every team member's machine.
Step 5: Show Status Colors in the View
Color the openings in your active view with their Approval and Drawing Status to spot what still needs work.
- Make sure your active view's View Template is set to
<None>. ConVoid cannot add filters to a view controlled by a template. - In the Manager, click Color Filter.
- Adjust colors with the color boxes next to each status checkbox.
An opening is colored by the highest-priority status that applies. Approval Status (Approved, Rejected, ...) wins over Drawing Status (Changed, Deleted, ...). This means a previously approved opening that just changed still appears green.
To find changed-but-still-green openings: open Fields, filter by Drawing Status = Changed and Approved by = your discipline. Those rows are the ones that need a re-review.
If the openings stay black after enabling the filter, the most common causes are:
- A View Template is active. Set it to
<None>. - Someone changed the Project Language in the profile. Reselect your language under Profile → Project Language and re-create the filter.
- The view's Discipline parameter is not set to Coordination, or the Detail Level is too low. Use Fine detail and Coordination.
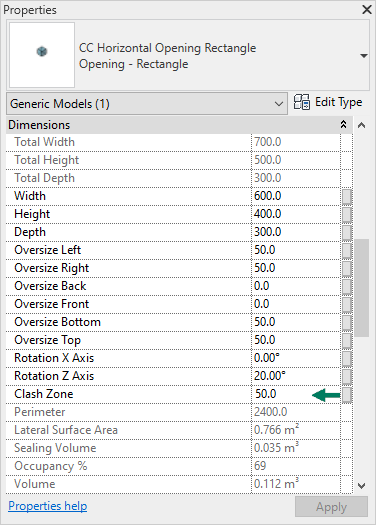
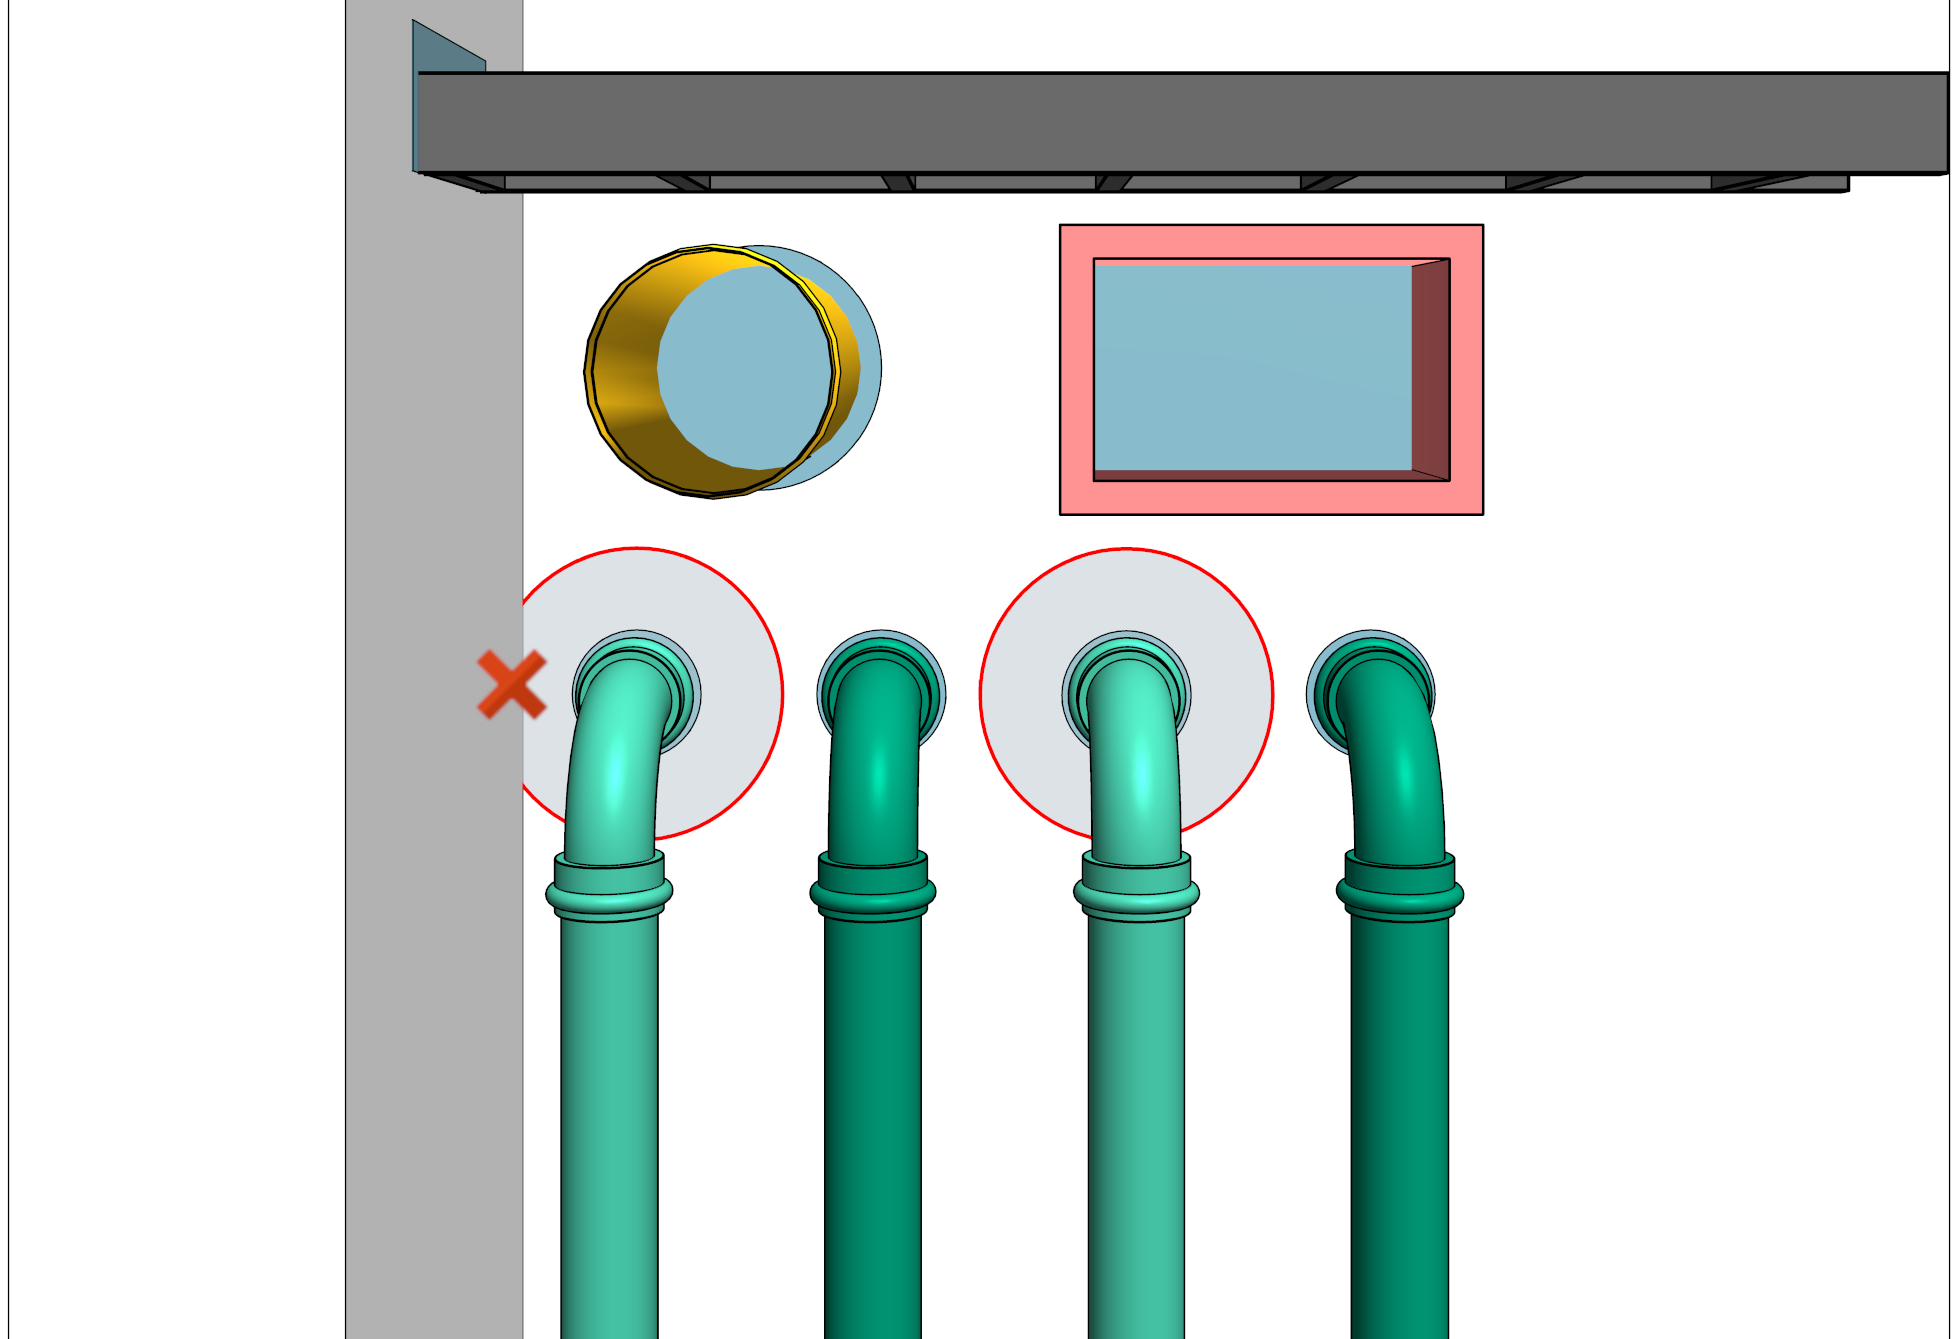
Step 6: Use the Clash Zone for Distance Checks
To verify clearance between an opening and a nearby element (a beam, a wall edge, another duct), enable the Clash Zone. The zone expands around the opening by the value you set. Click Clash Detection to see clashes immediately. The Clash Zone is only visible in 3D views.
Step 7: Review Approvals from Other Disciplines
After you receive feedback (via Approval Synchronization or a BCF Import), you want to see what the other discipline decided.
Use the discipline dropdown above the Approved button: select for example STR or ARC to recolor the table and active view in that discipline's status colors.
The dropdown also controls which discipline you write to with Approve / Reject / Pending / Reset. Forgetting to switch back is the most common reason approvals end up under the wrong discipline.
A red notification next to the Revit ID column marks openings that received an Approval Status update or a new comment in the last import. Click those rows first.
Verify Your Results
Before you close the Manager, do this quick check:
- The discipline dropdown shows your discipline.
- The Approved by column for the openings you just processed contains your discipline tag (for example
MEP). - The color filter view shows no unexpected colors. Any Multi-Approved openings are coordinated, Rejected openings have a comment, Default openings still need a decision.
Reset Approval on Geometry Changes
ConVoid resets the Approval Status to Pending automatically when an opening's geometry changes during an update run. This is the recommended default: if a partner moves an opening you previously approved, you want to see that the approval is no longer valid.
You can change this in Settings. Disable it only when your team explicitly agrees that already-approved openings should keep their approval after small changes.
Keep Reset Approval Status on Changes enabled. It is the safer default and the source of fewer support tickets.